Tag Archives: steek

Eeek! Steeks!

Back in 2012, I took a steeking class with Mary Scott Huff at Columbia Gorge Fiber Festival (blog post here). It was fabulously fun, and I learned 3 ways to secure my steek. My favorite was the crocheted steek, so that’s what I use. I’ve been thinking of ways to fine tune them, though, so I decided to sit in on Mary’s class yesterday morning via Bazaar Girls Yarn Shop. It did not disappoint.

Top picture, going around from right to left: One full stitch in the center with slip stitch crochet reinforcement through the two stitches on each side of it; half of each center stitch reinforced with slip stitch crochet through the stitch next to it; and half of each center stitch reinforced with single crochet to the stitch next to it.

Bottom pictures are a closeup of the single crochet reinforcement going through half of the center stitch and half of the stitch on each side.

Here’s what I found: Leaving a whole stitch in the center means messier ends. But it also means security. I’m a belt and suspender kind of knitter, I want to make sure things won’t fall apart. Today’s exercise showed me that it won’t fall apart. Probably. Heh. There are many ways to secure a steek, and none of them are wrong if you get the result you want! I’ve seen a one stitch steek on an Icelandic sweater, and I’m too chicken to try it.

What I was really wondering about was the bulkiness of my crocheted steek, since I’ve been working with worsted weight yarn. Best answer? Use a lighter weight yarn to crochet the reinforcement, like I did with these swatches. If I pick a coordinating color, single crochet makes a lovely finished edge without any more fuss (bottom 3 pictures on collage above). If I’m trying to minimize bulk, like maybe behind a zipper, slip stitch crochet works well. Picking up a ribbing or other edging in the column of stitches a couple stitches away from the cut edge forces it to turn back, like a seam allowance, and all the ends are hidden either way.

But enough about my crochet steek fussiness. Here’s a new one (I had previously read about it in Modern Daily Knitting). A needle felted steek! Look at this: all business on the front…

Fuzzy party in the back! It holds beautifully. I’d probably want to do something to make that edge look more finished, though.

What a fun way to spend a morning! But now it’s on to other tasks…still knitting away on the log cabin wrap; I have 4 more logs to knit, and then I’m done. Tech editing is done, too. I’ll check in with my test knitters, but look for it mid-April.

Onward!

Stop me before I steek again!

mug rugs before steeking

Oh, too late.

steeked snowflake

I had knit this snowflake mug rug, but decided that the other pattern was better for a beginning stranded colorwork knitter. Shorter floats and a short repeat. But I really liked it, so I decided to add it to the Bucket List Coffee Accessories pattern as a bonus.

snowflake coffee cozy set

Of course, it needed its own coffee cozy, too. These would make quick and easy holiday gifts. Pattern has been updated in Ravelry. Have fun! And if you’re local and need steeking support, come join me for steeking class, this Saturday and next, at Twisted.

Bucket list knitting: Steeks!

Is steeking on your knitting bucket list? Say yes!

steek promo

A steek is a column of extra stitches inserted into your knitting so you can cut them. Why? Because stranded colorwork is so much easier in the round than knit flat. But when you want that circular knitting to be flat, as in a cardigan or a scarf, you need to cut the steek.

mid steek

It’s not as scary as it sounds, especially if you do it to a small piece of knitting, instead of the cardigan you’ve been knitting for months. To that end, I’ve designed a couple pieces to practice on.

bucket list coffee accessories

Oh, coffee, I love you so much I knit a sweater for you. And a mug rug.

These are the Bucket List Coffee Accessories. You can use them for your tea, too. I won’t tell anyone. I designed these for a class I’m teaching at Twisted later this month (see end of post for details).

They make sweet gifts, and they’re an opportunity for you to try steeking, even if you can’t come to class. The pattern is available through Ravelry, and it’s on sale for 20% off through October 15 with coupon code EEK. As in steek. Ha!

I wrote a longer tutorial here, in case you like more pictures. Who doesn’t like more pictures?

For this project, I knocked a couple things off *my* bucket list, too. It’s small circular knitting, which I usually do on dpns. I wanted to know how to knit with 2 circulars, and with magic loop. Done. I liked the magic loop. Working with two circulars is like having antennae waving all over the place, too flappy for me. Your mileage may vary.

I’m teaching a steek class with the Bucket List Accessories at Twisted on October 17 and 24 at Twisted. Come join me, and we’ll explore stranded colorwork on dpns, magic loop, and 2 circulars. During the second class we’ll cut these quick pieces with the support of our classmates. There may be bubbly at the end of the second class!

The very first time I saw a steek cut, it wasn’t even colorwork. My cousin and college roomie Kathy had been an AFS exchange student in Norway, and she was knitting a purple sweater in the round. Since it was stockinette, it was all knit, no purl. She steeked the armholes, because that’s how she was taught in Norway. Are you purl averse? Take that idea and run with it!

Steeking success

Our steeking class was small but brave. Naomi and Deborah did all their homework, and came to show their knitting just who’s boss. I also knit another Kerfuffle so I could cut right along with them. First, we marked our cutting line. This made it a lot easier to see where to crochet our reinforcement.

20121127-182154.jpg

Deborah was the first to cut.

20121127-182605.jpg

It’s always nice to have friends for support on your first steek! I cut next.

20121127-182758.jpg

And Naomi cut her steek, too.

20121127-182829.jpg

I brought bubbly, and we toasted our success! We picked up the stitches for the ruffle and headed home. Thanks to Naomi and Deborah, for doing all the homework, and for having faith that this little cutting exercise would work out!

Question for you: Would you rather steek and cut a swatch, or an actual project, like we did on Monday? There’d be homework either way, but a swatch would be a quicker, simpler knit. I’d love to teach a class like this again, and am wondering which way would make it the most enticing.

Onward! I finished my Kerfuffle that night, and blocked it the next day.

20121127-183016.jpg

The purple scarf is another Filigree, knit with MadelineTosh Pashmina. It’s sport weight, and it’s absolutely yummy. I knit it mostly because I wanted to see if there was enough yarn in a skein to make this, since the other Filigrees are knit with fingering weight. The answer is yes, I had plenty of yarn. And the sport weight version is just a little weightier, which is pretty cozy for winter. I’m not sure if this one is for me, or for a friend. We’ll see!

What’s next on the knitting agenda? I have a few design projects that are due in the next few months, so my home knitting will be focused on that. But for public knitting? I’m planning to knit another Filigree, and you are welcome to join me! I’m planning a knitalong, both through the blog and in person at Twisted during December. It’s a quick knit, one skein, a perfect gift. More details in the next post, after I get things figured out. I hope you’ll knit with me!

Ready to steek

You can get a lot of knitting done while waiting for a turkey to cook on the grill…

20121123-110157.jpg

The checkerboard section in the center is where I’ll be cutting this piece in class on Monday night at Twisted. There’s still room in the class, if you’re a quick knitter and can get your homework done by Monday evening!

We expected our turkey to be done in 4 hours, but it took 6. Such are the vagaries of using a grill to cook a turkey.

20121123-110548.jpg

It was worth the wait! Our standard sides: potato/carrot/onion/celery stuffing, Brussels sprouts, baked sweet potatoes and apples, rice stuffing with Chinese sausage/oysters/celery/water chestnuts. The rice stuffing is my addition; my Dad used to make it and my kids love it. The potato stuffing is the classic from DH’s family. Something for everyone!

The only hitch in the weekend is that my in-laws were unable to make it. Dad is recovering from pneumonia. He’s much better, but not ready for travel. It’s the first time in 25 years that we haven’t been together, but we did a little Facetime chat. Thank you, technology!

I hope your Thanksgiving was filled with friends and family and good food. What’s your go-to side dish?

Eeek! Steeks! 3KCBWDay6

Last year during 2KCBW, I mentioned that I was going to learn to steek. I had all my research done and my game plan mapped out. All I needed to do was to “just do it.” But nothing happened. Eventually I realized I needed something to force me into it, so I signed up for a steeking class at my LYS. Unfortunately, I was the only person to sign up (chickens!), so the class was canceled. I thought I was off the hook. Then came the word: Mary Scott Huff, author of The New Stranded Colorwork, was going to teach a steeking class at Columbia Gorge Fiber Festival. It was time to commit!

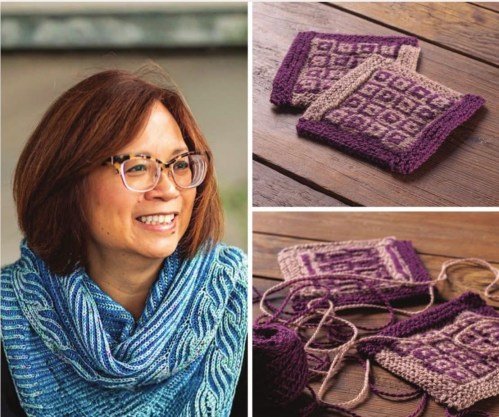
Mary is an absolutely fabulous teacher. She’s funny, warm, down to earth…and fearless. Which you’d have to be, if you’re telling people that they’re going to cut up their knitting.

bouquet

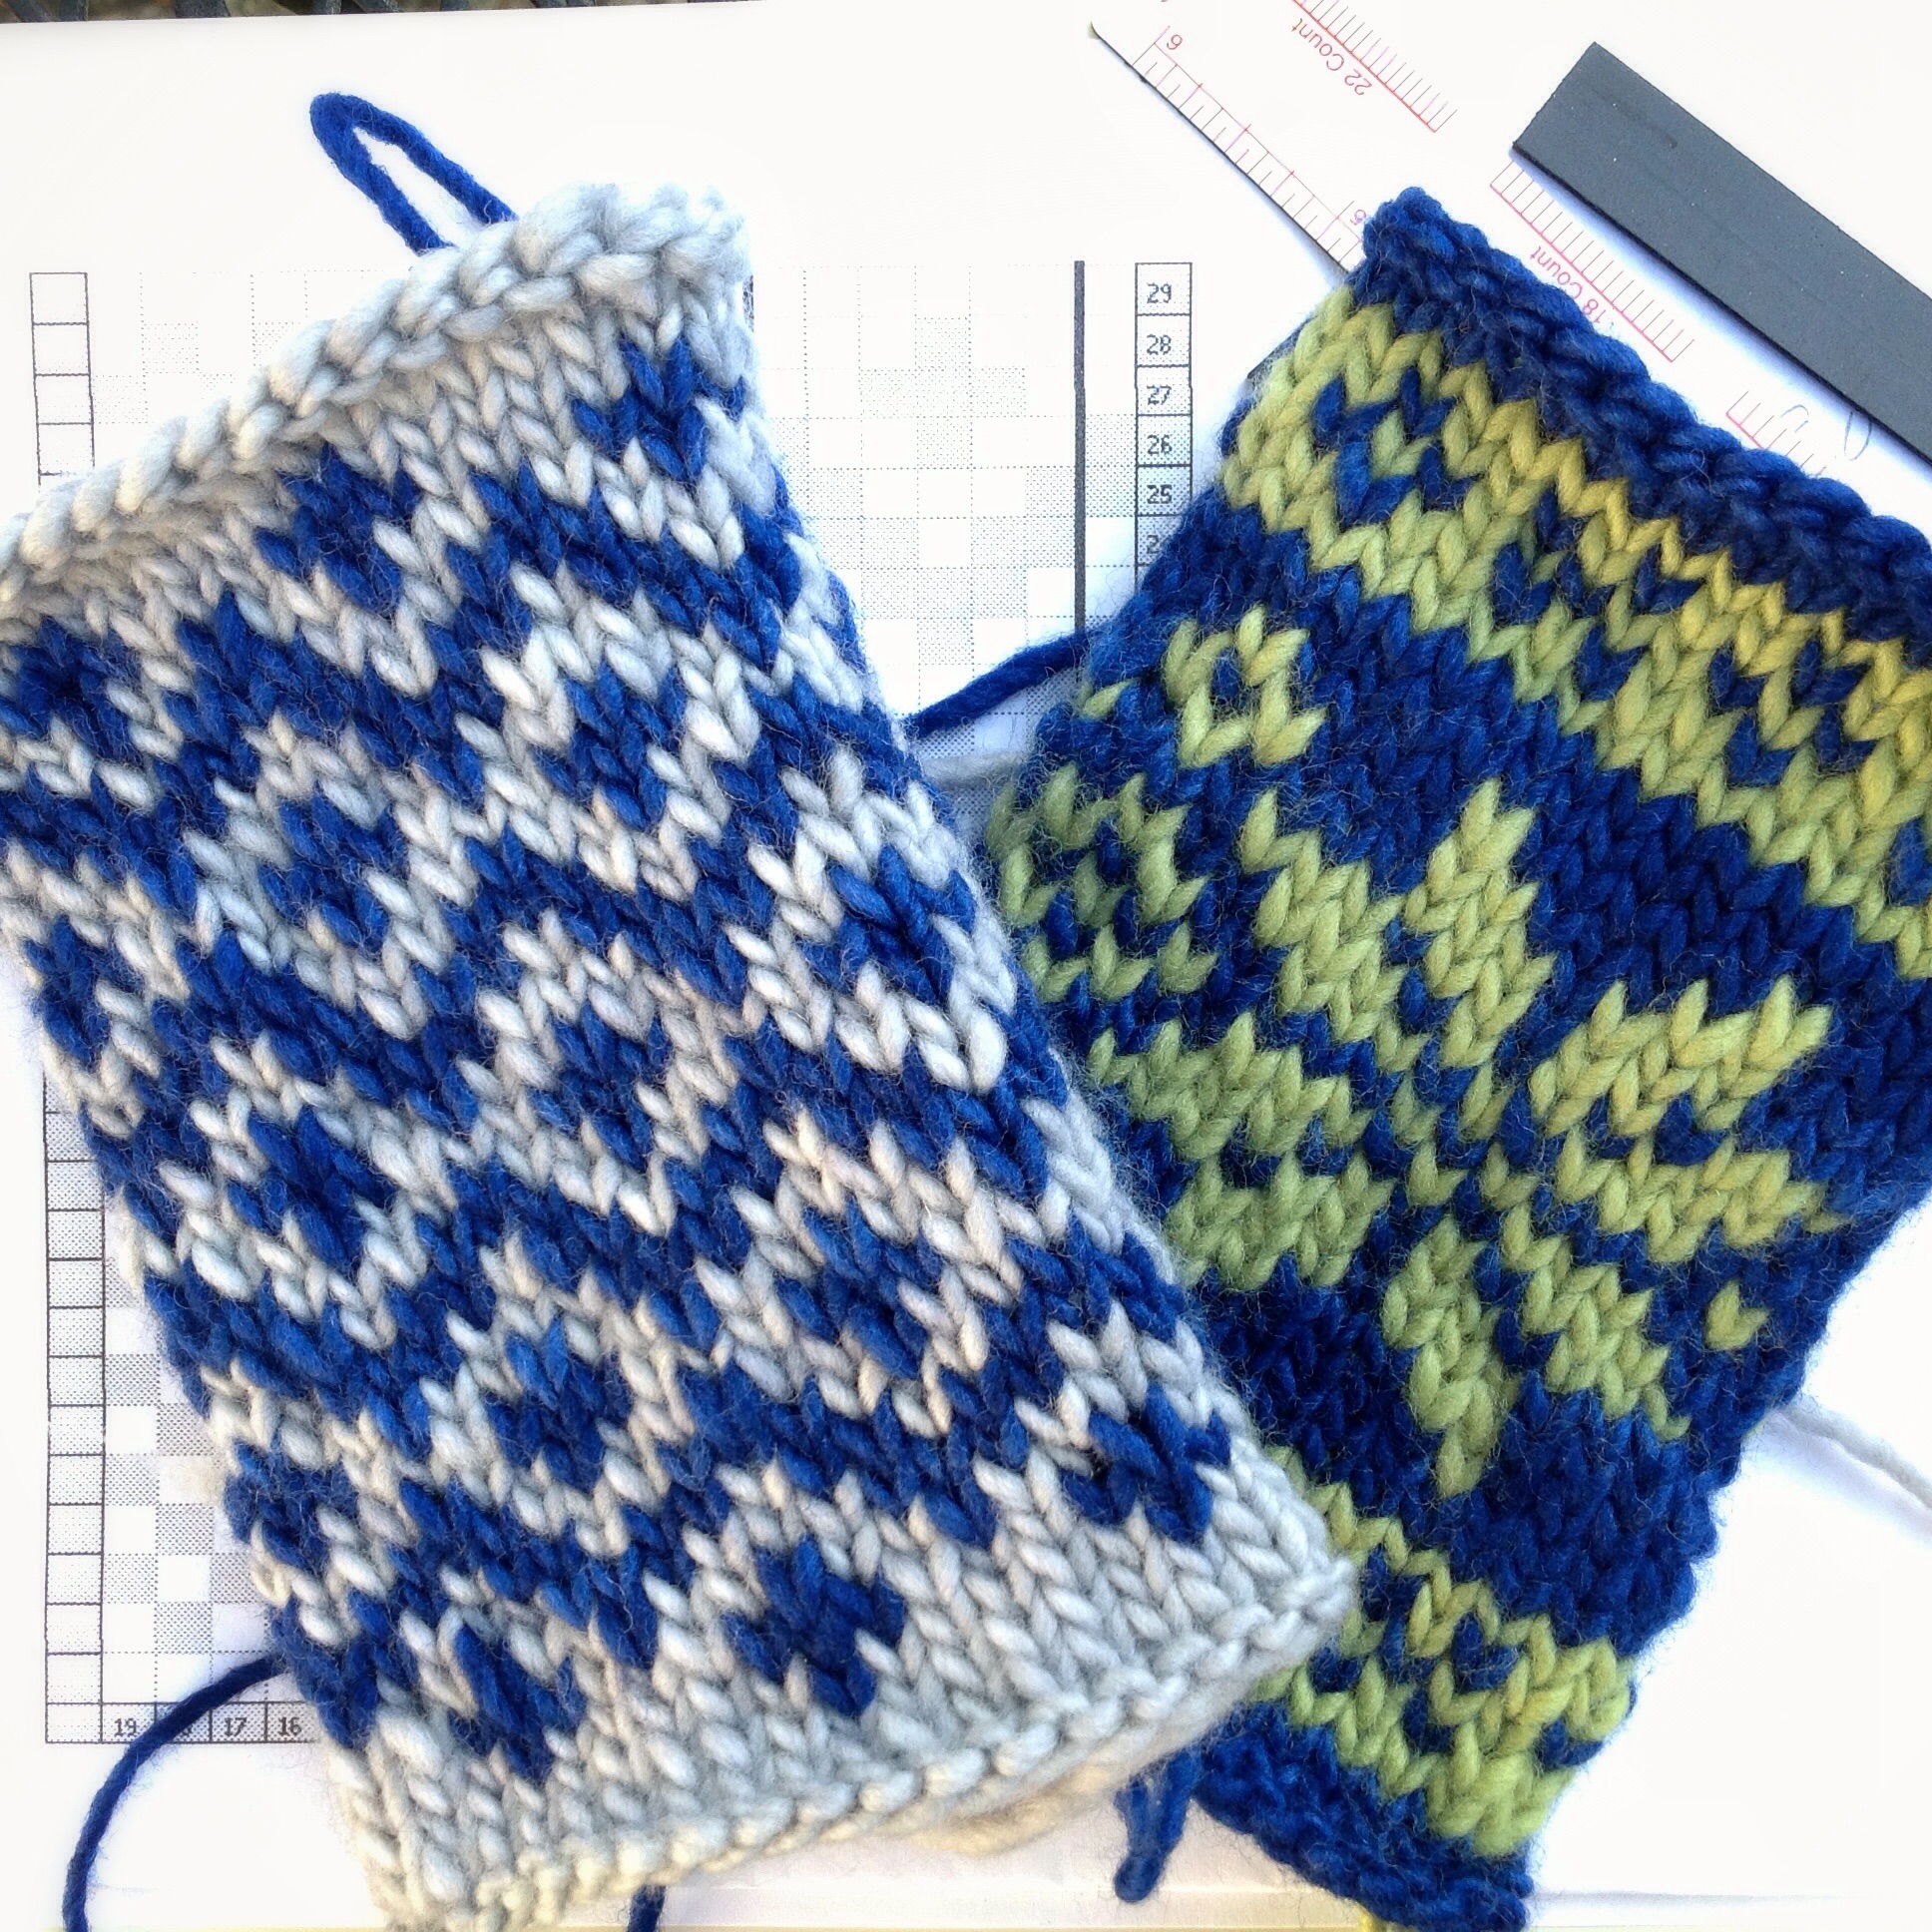
Apparently I had the right idea last year: steek on a swatch that you don’t care about. This works with the Tink Drop Frog class that I teach, too. There’s no emotional investment when you’re experimenting on a swatch! Perfect.

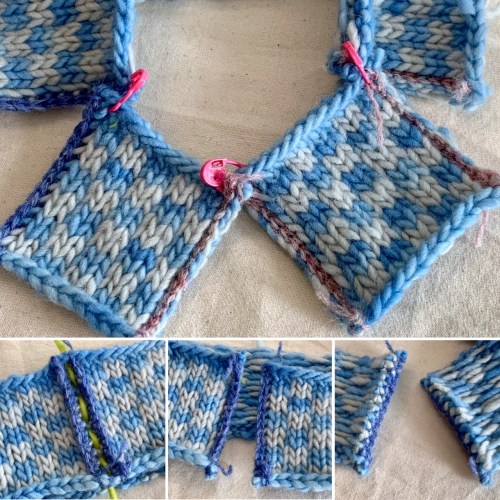
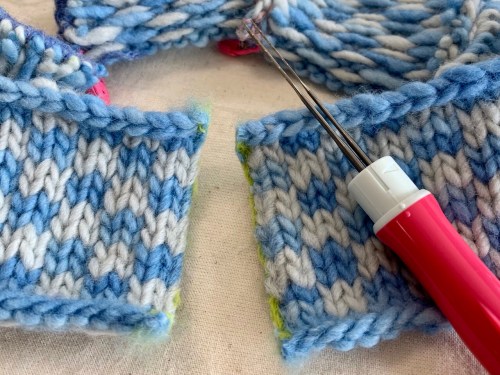
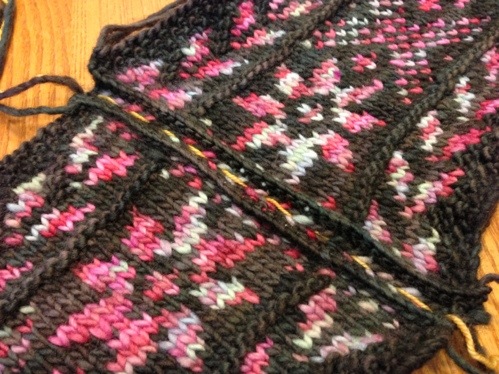
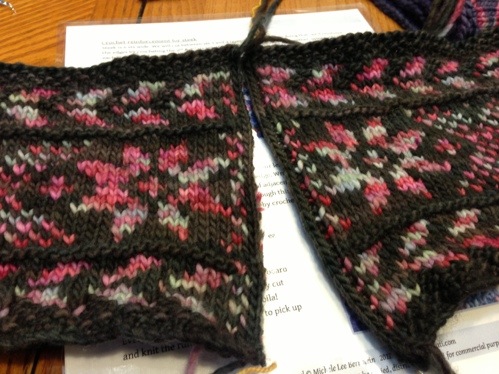
We learned 3 steeking techniques. The first used simple stitching to mark and reinforce the steek. Recognize this picture from Tuesday? The green yarn marks the cutting line, and the red thread is the reinforcement.

stitched

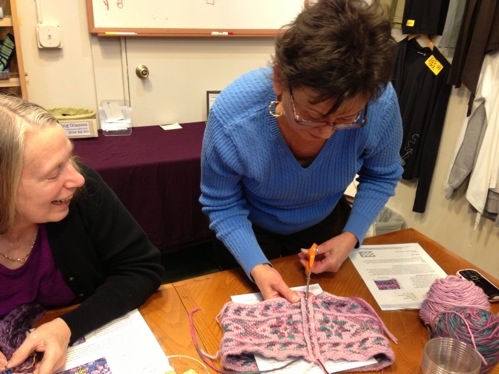
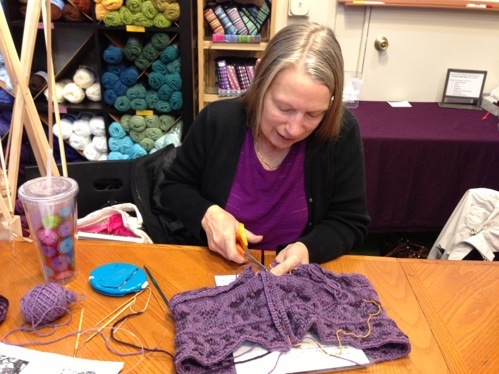
The first cut is the scariest, but Cathy wasn’t scared.

gocut2

Me, neither. It’s a swatch!

first cut

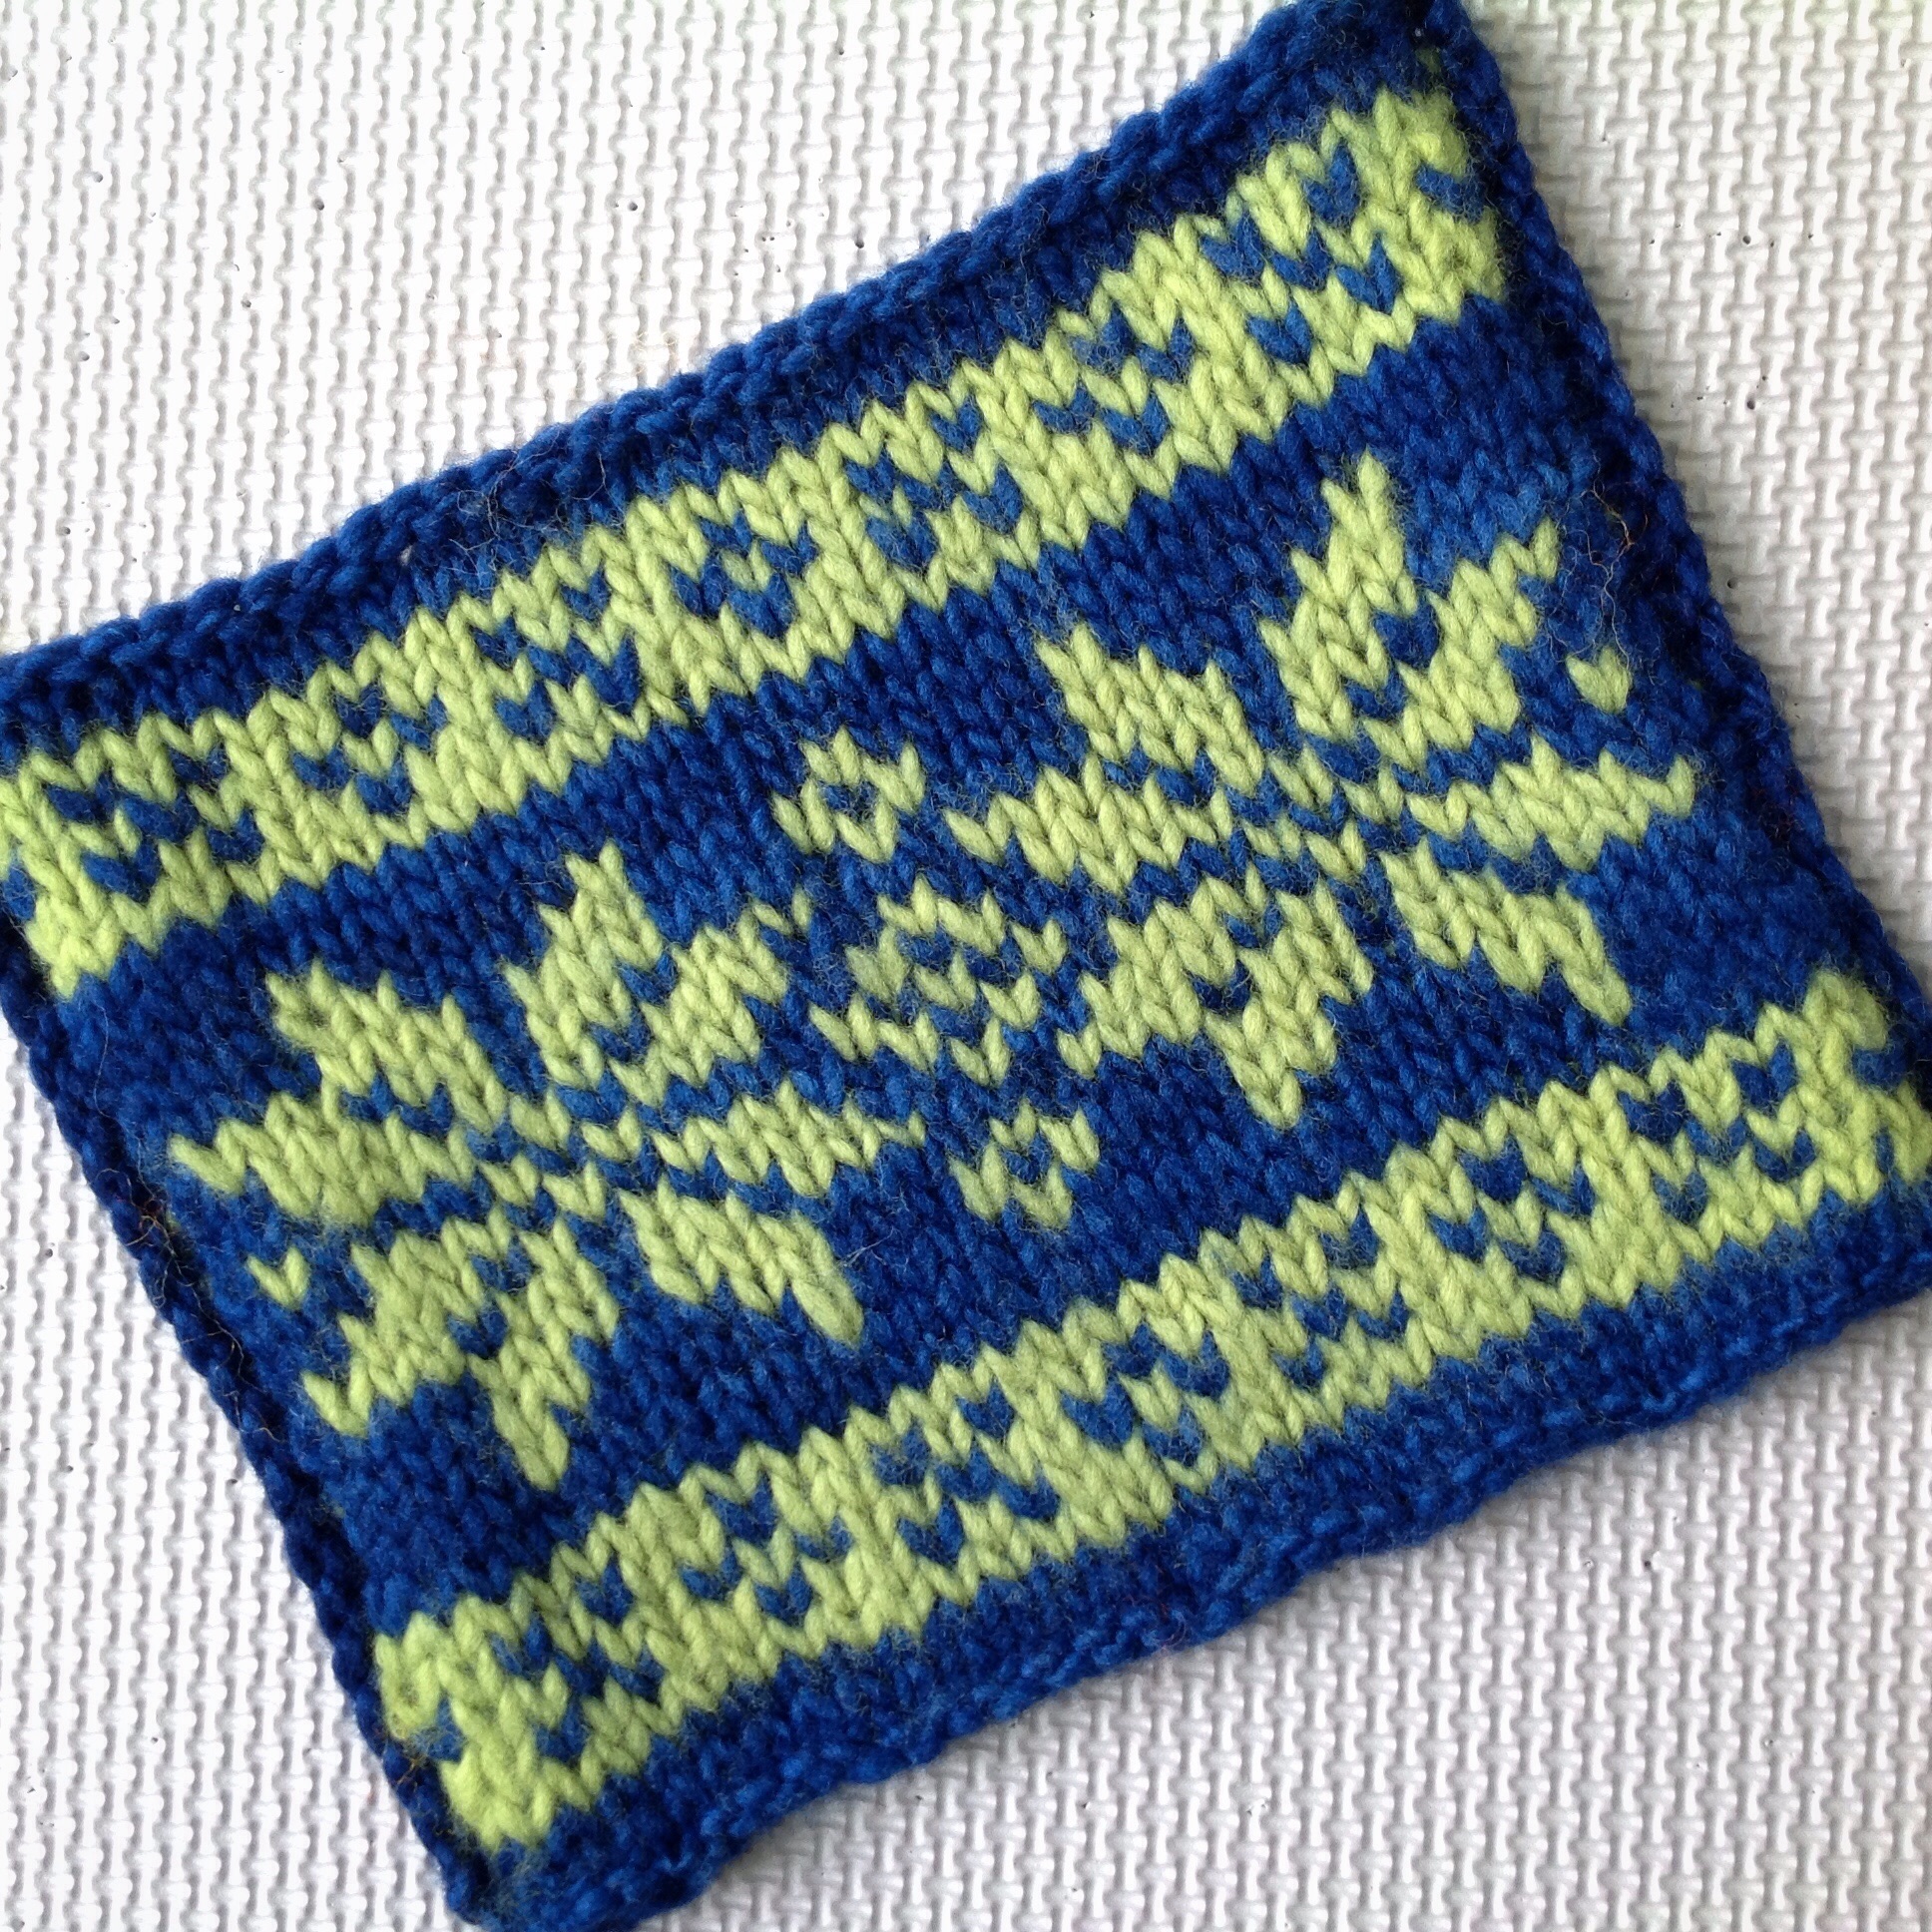
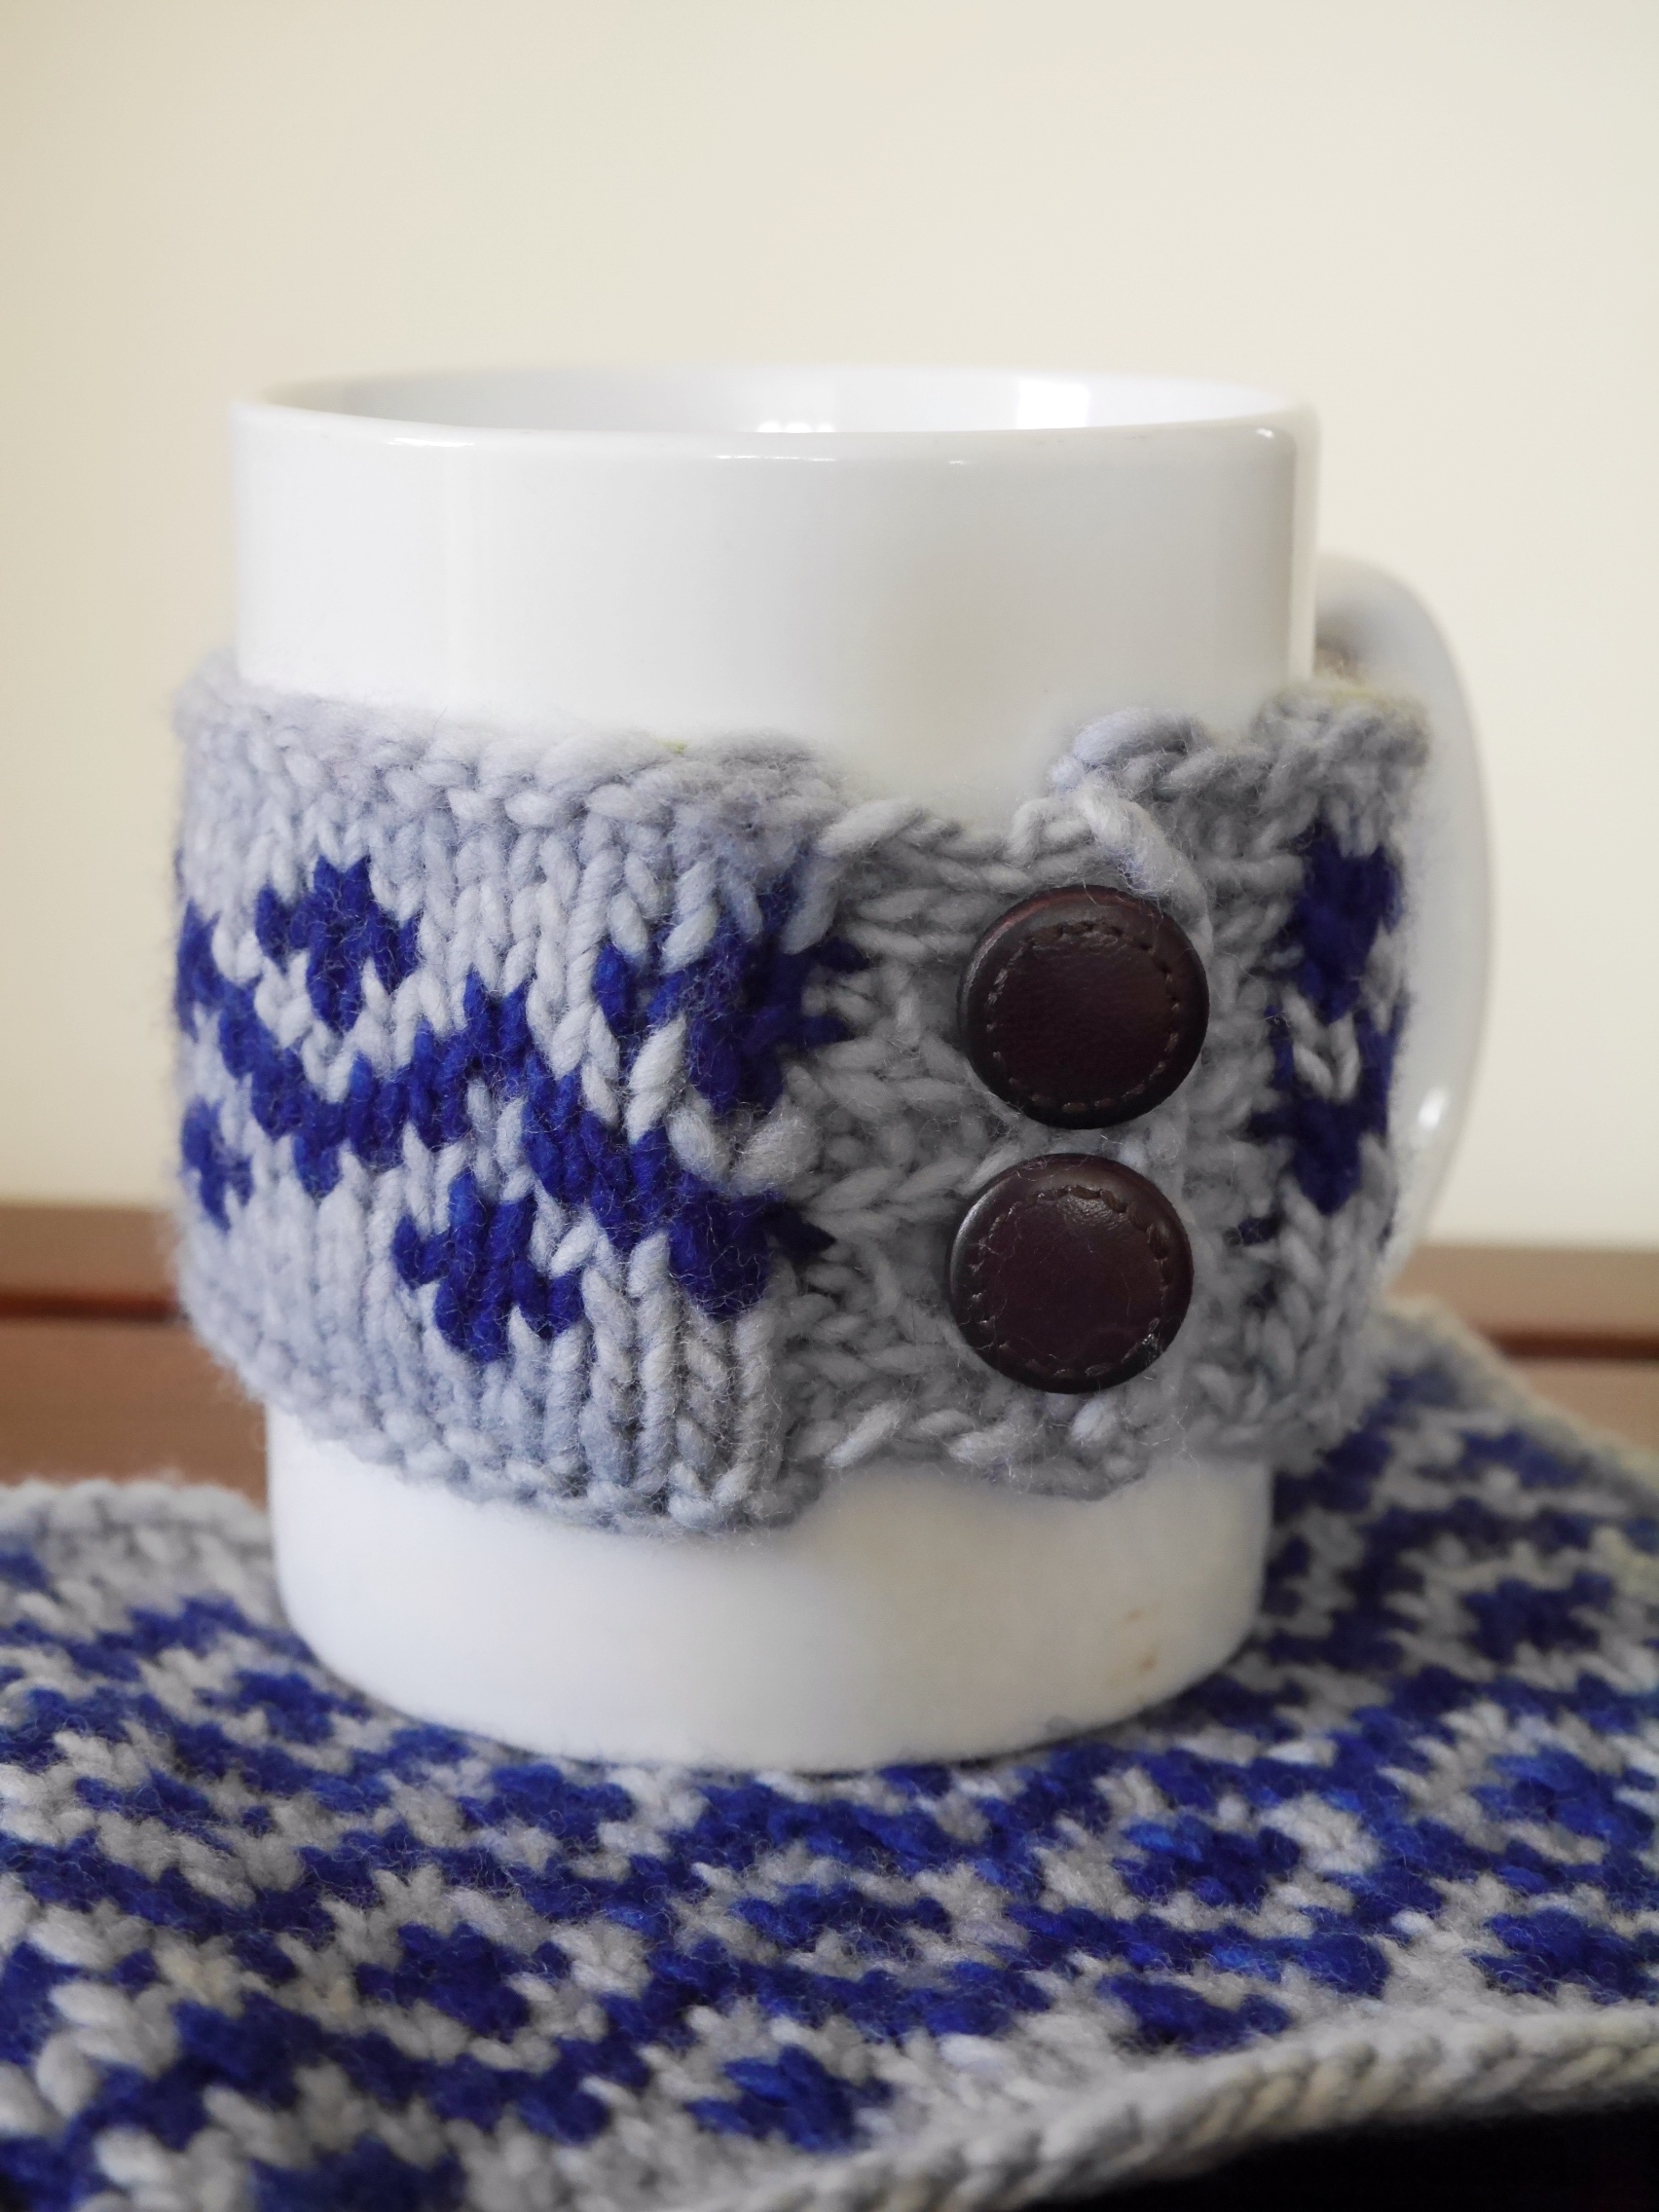
The edge isn’t terribly stable, but it’s good enough that you can pick up and work an edging, a couple stitches in from the edge. This is an edge that you’d want to cover with seam binding or something similar. I’ve picked up and knit a garter stitch edging; see how the steeked edge turns to the back of the fabric?

edged

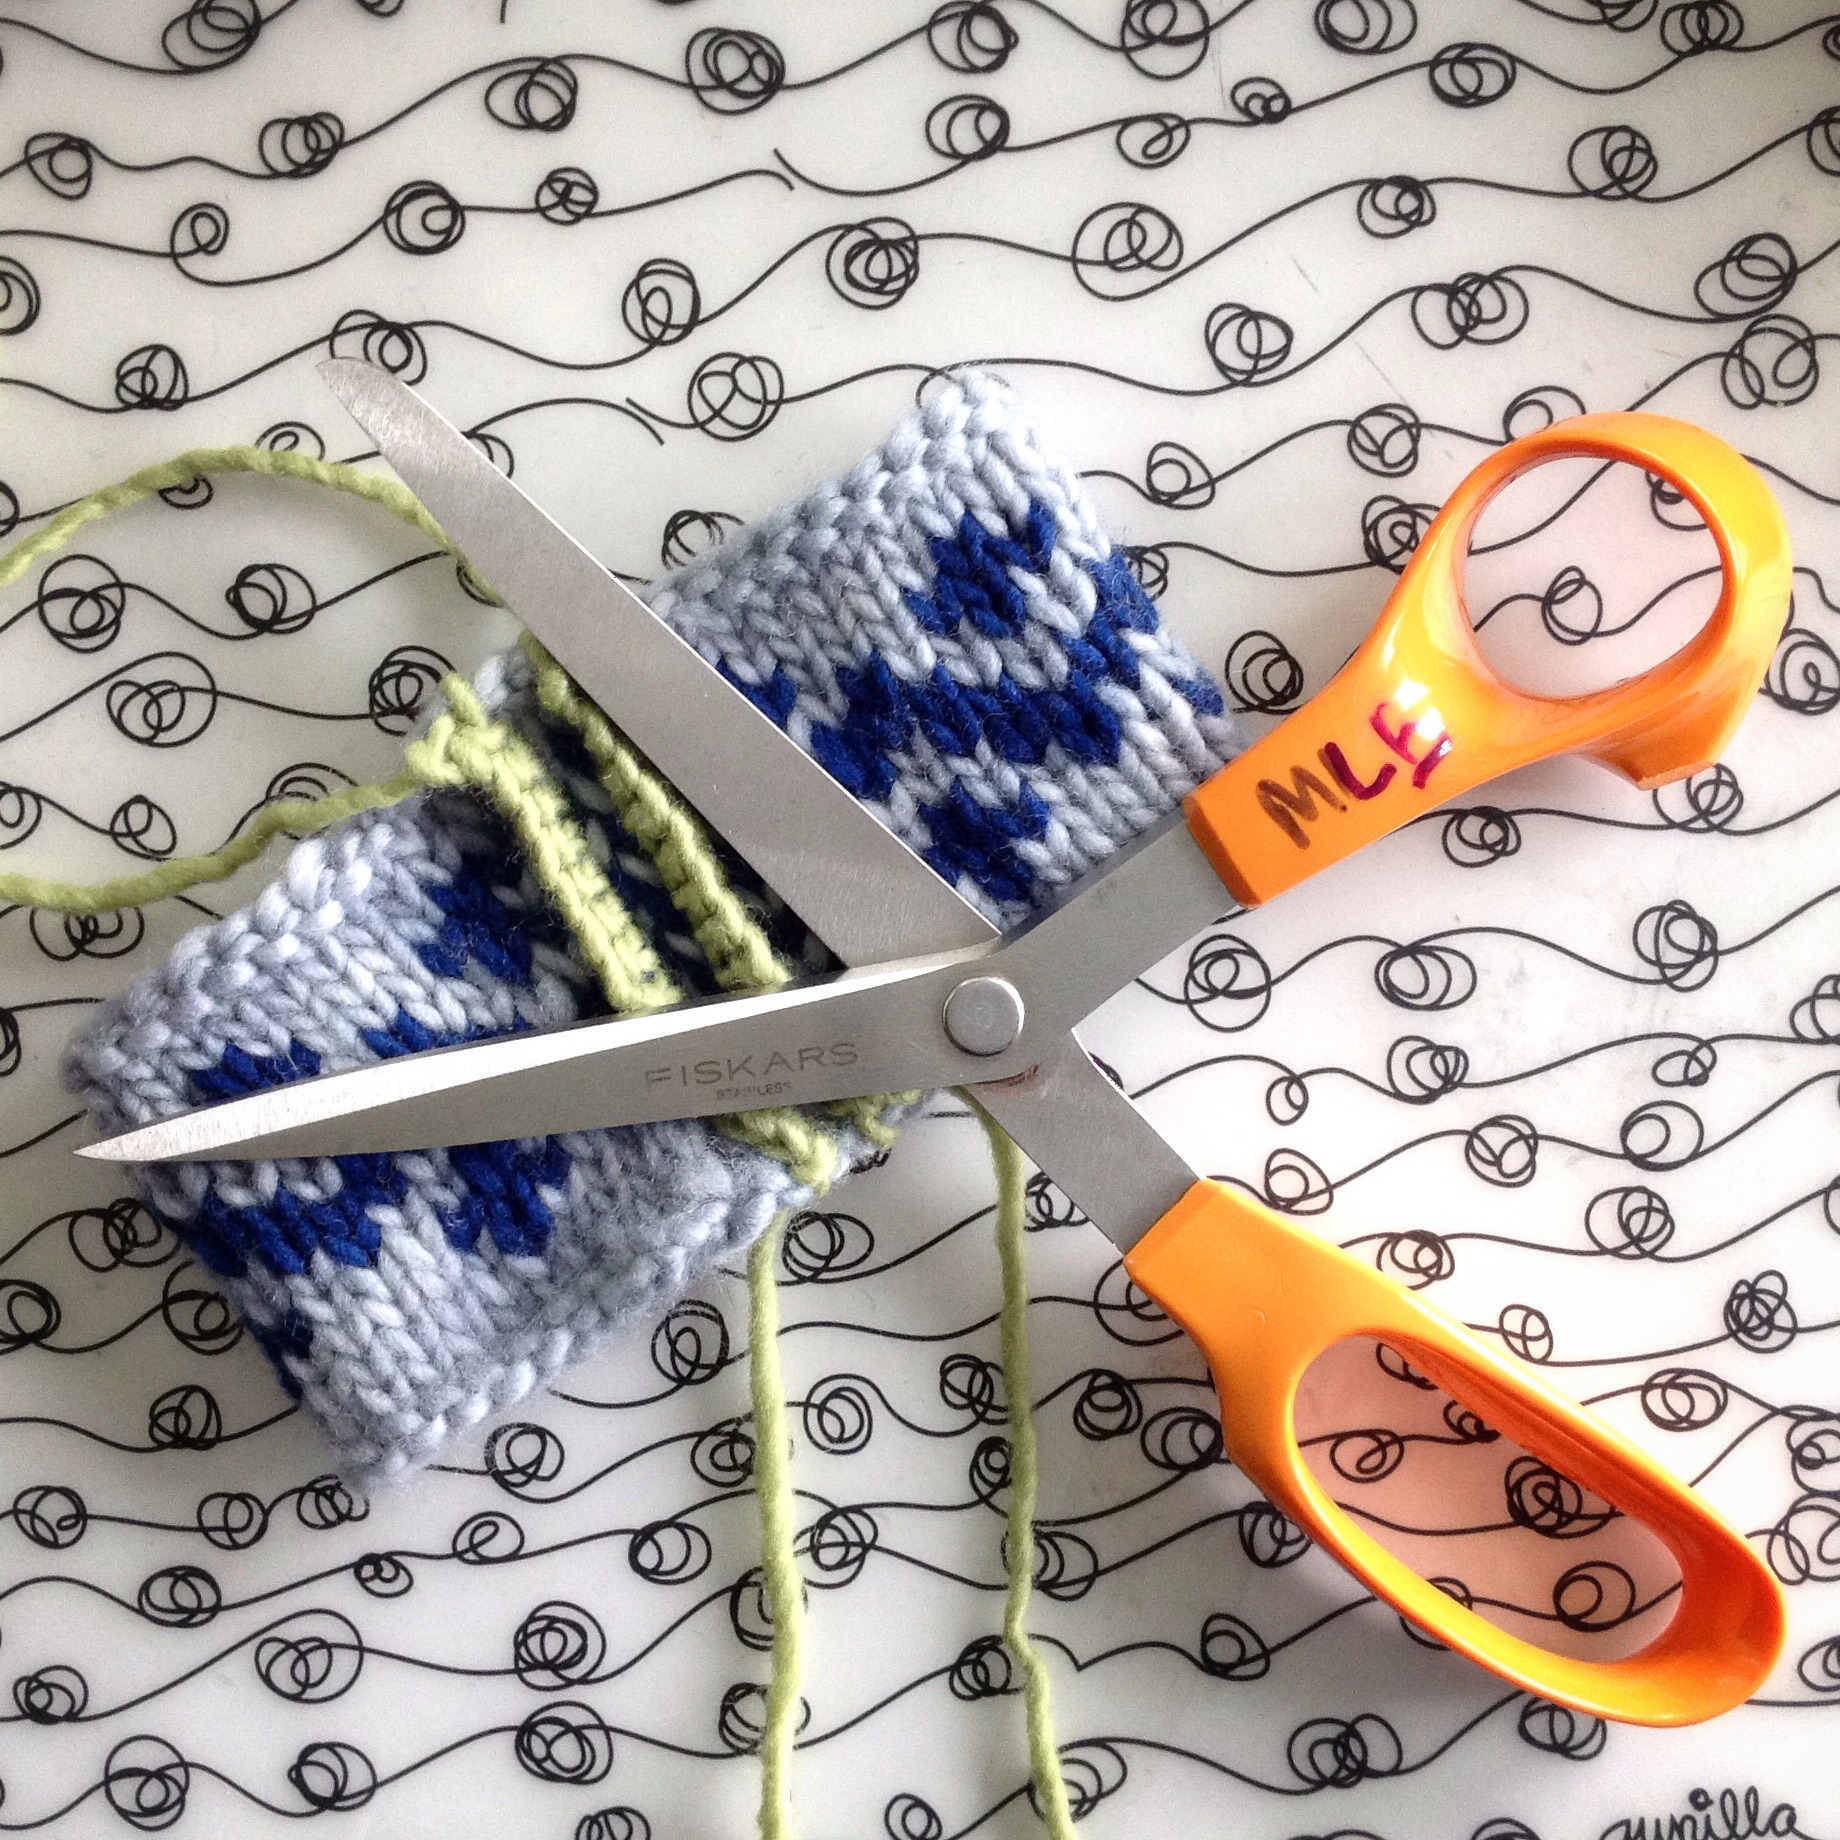
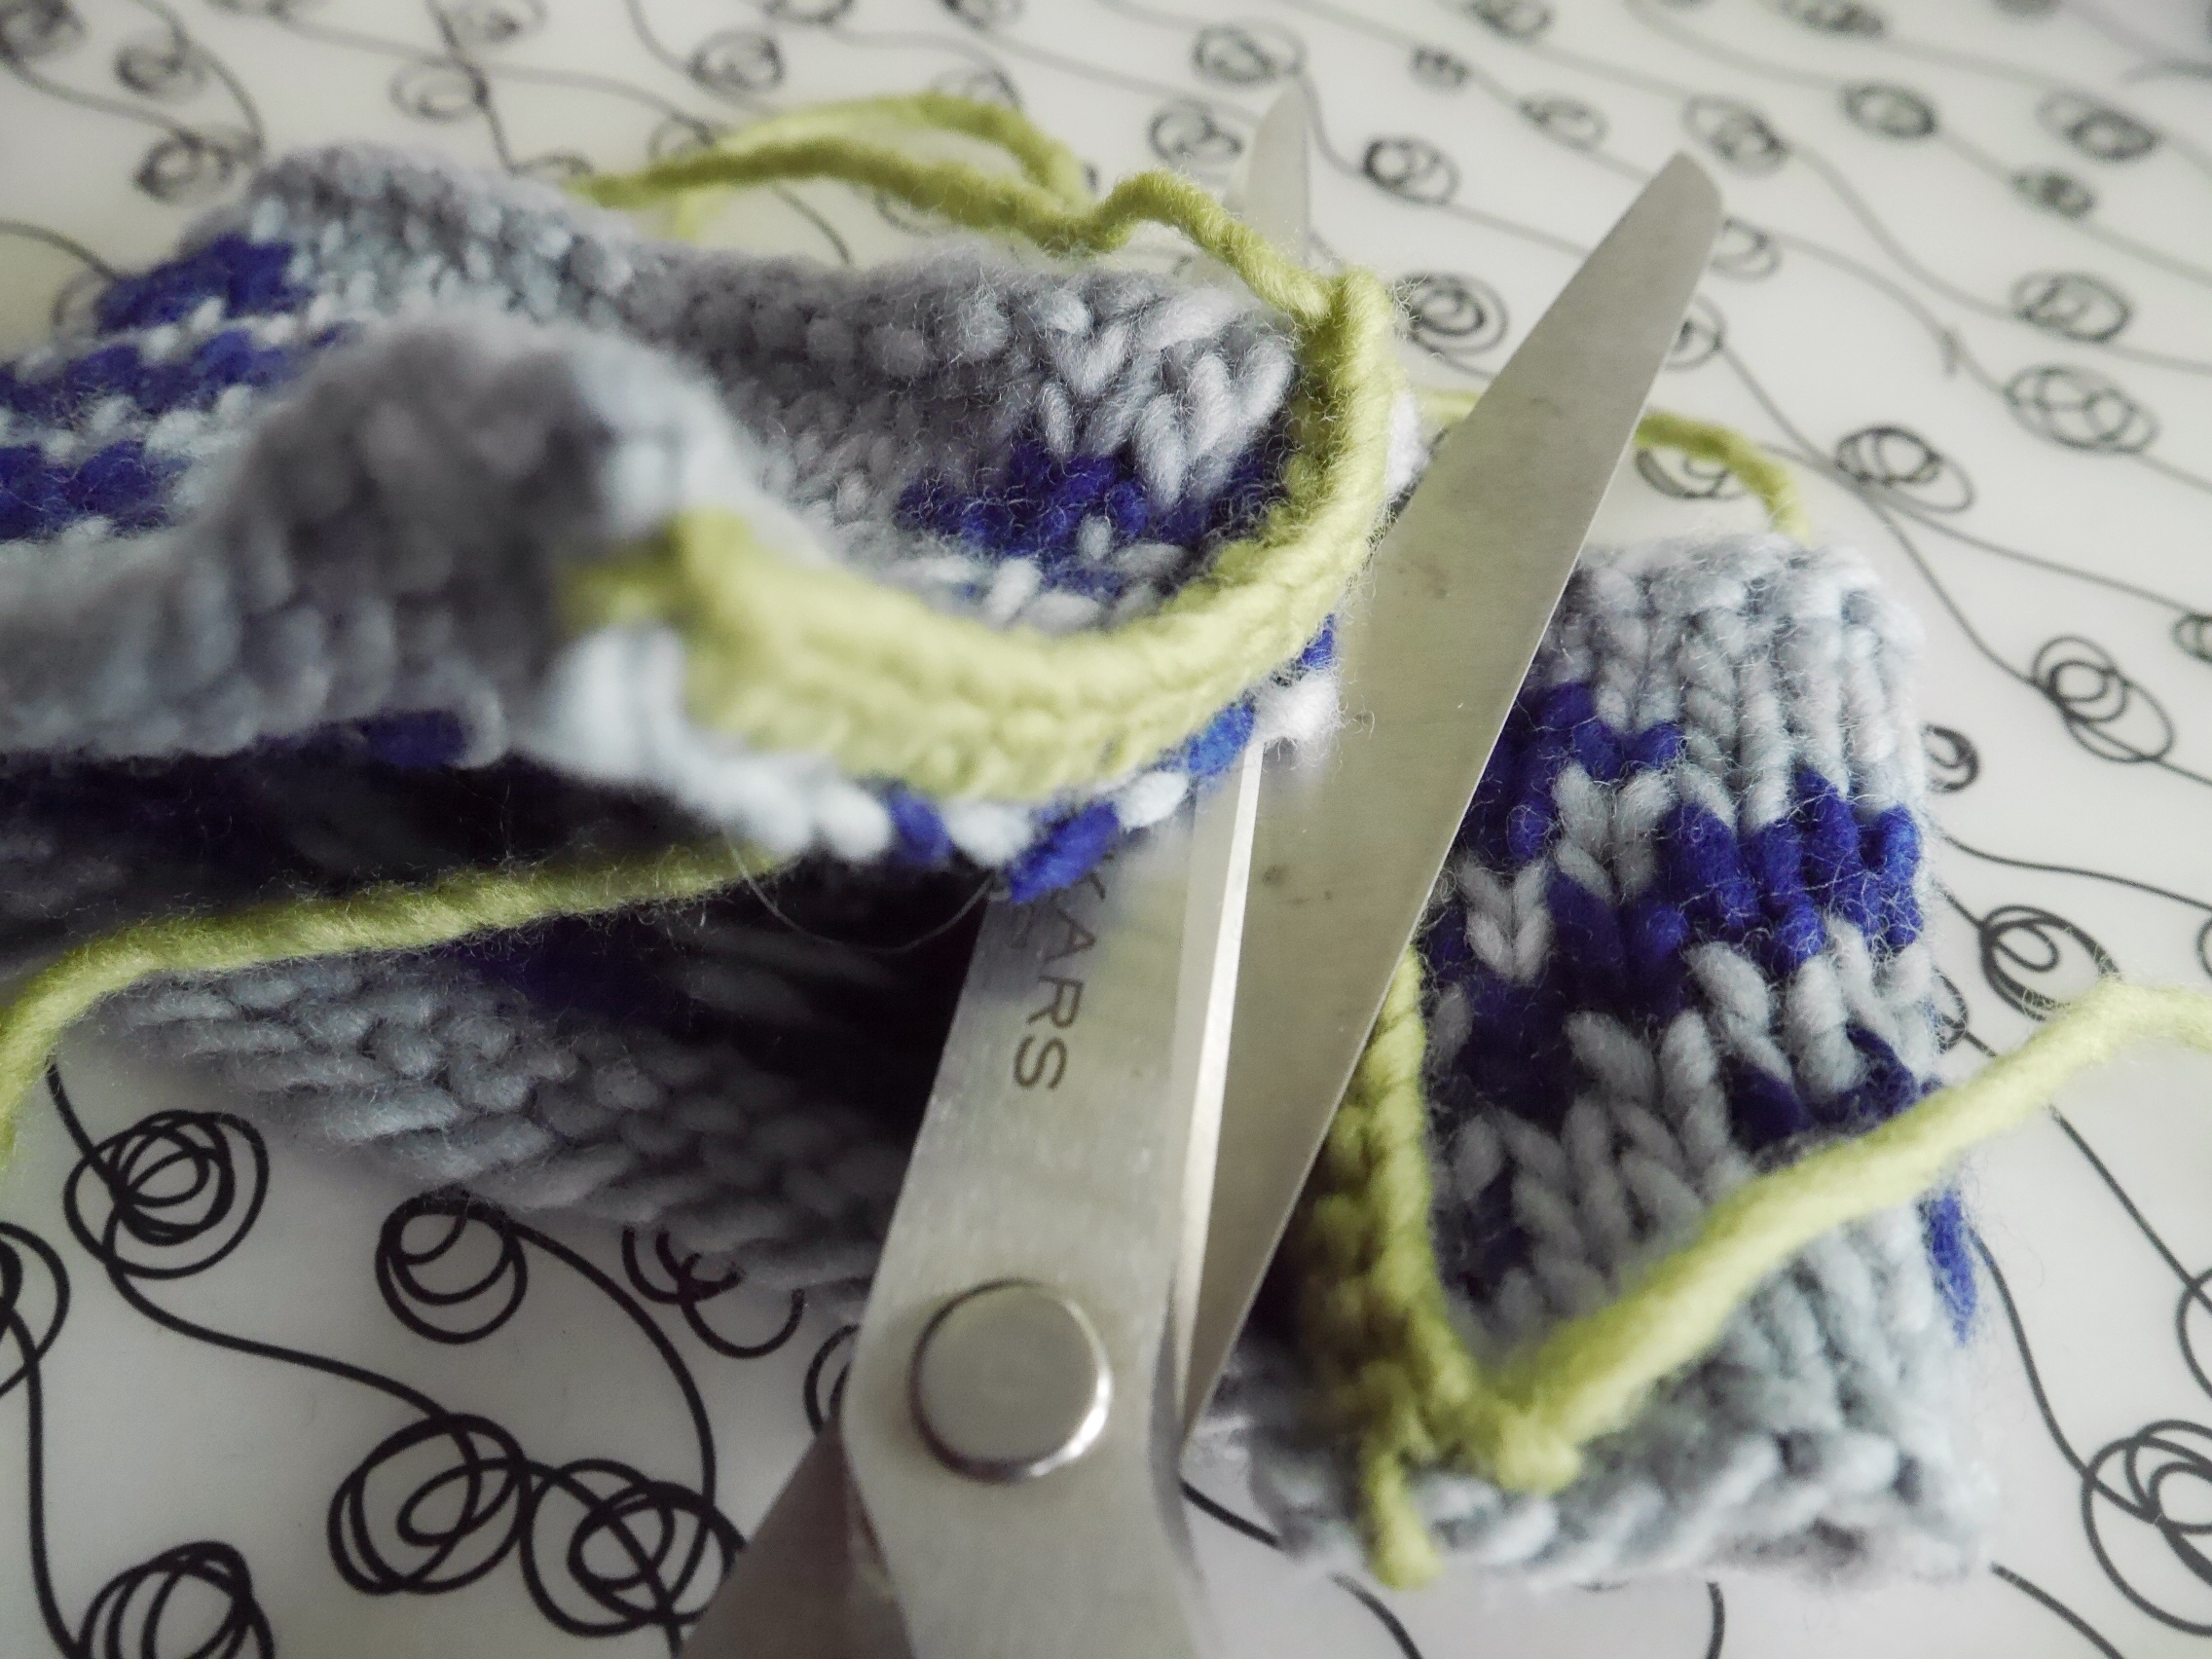
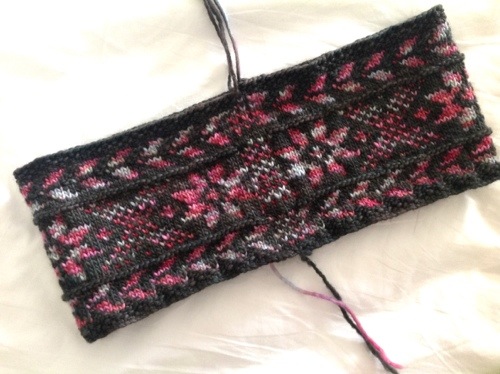
The second steek used crochet to stabilize the edge. This is similar to the the one that I read about in Knitters magazine last year. I love how tidy it looks. (Look at all those blades! Are you feeling nervous?)

crochet

And look! I’m cutting!

cut2

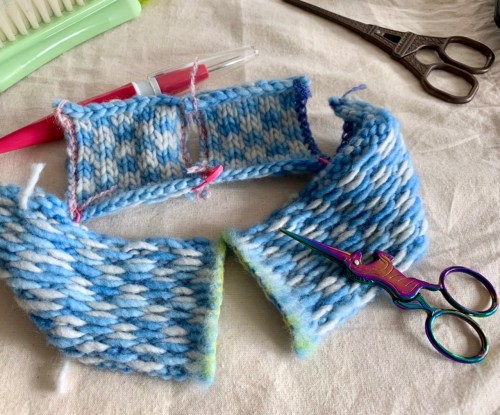
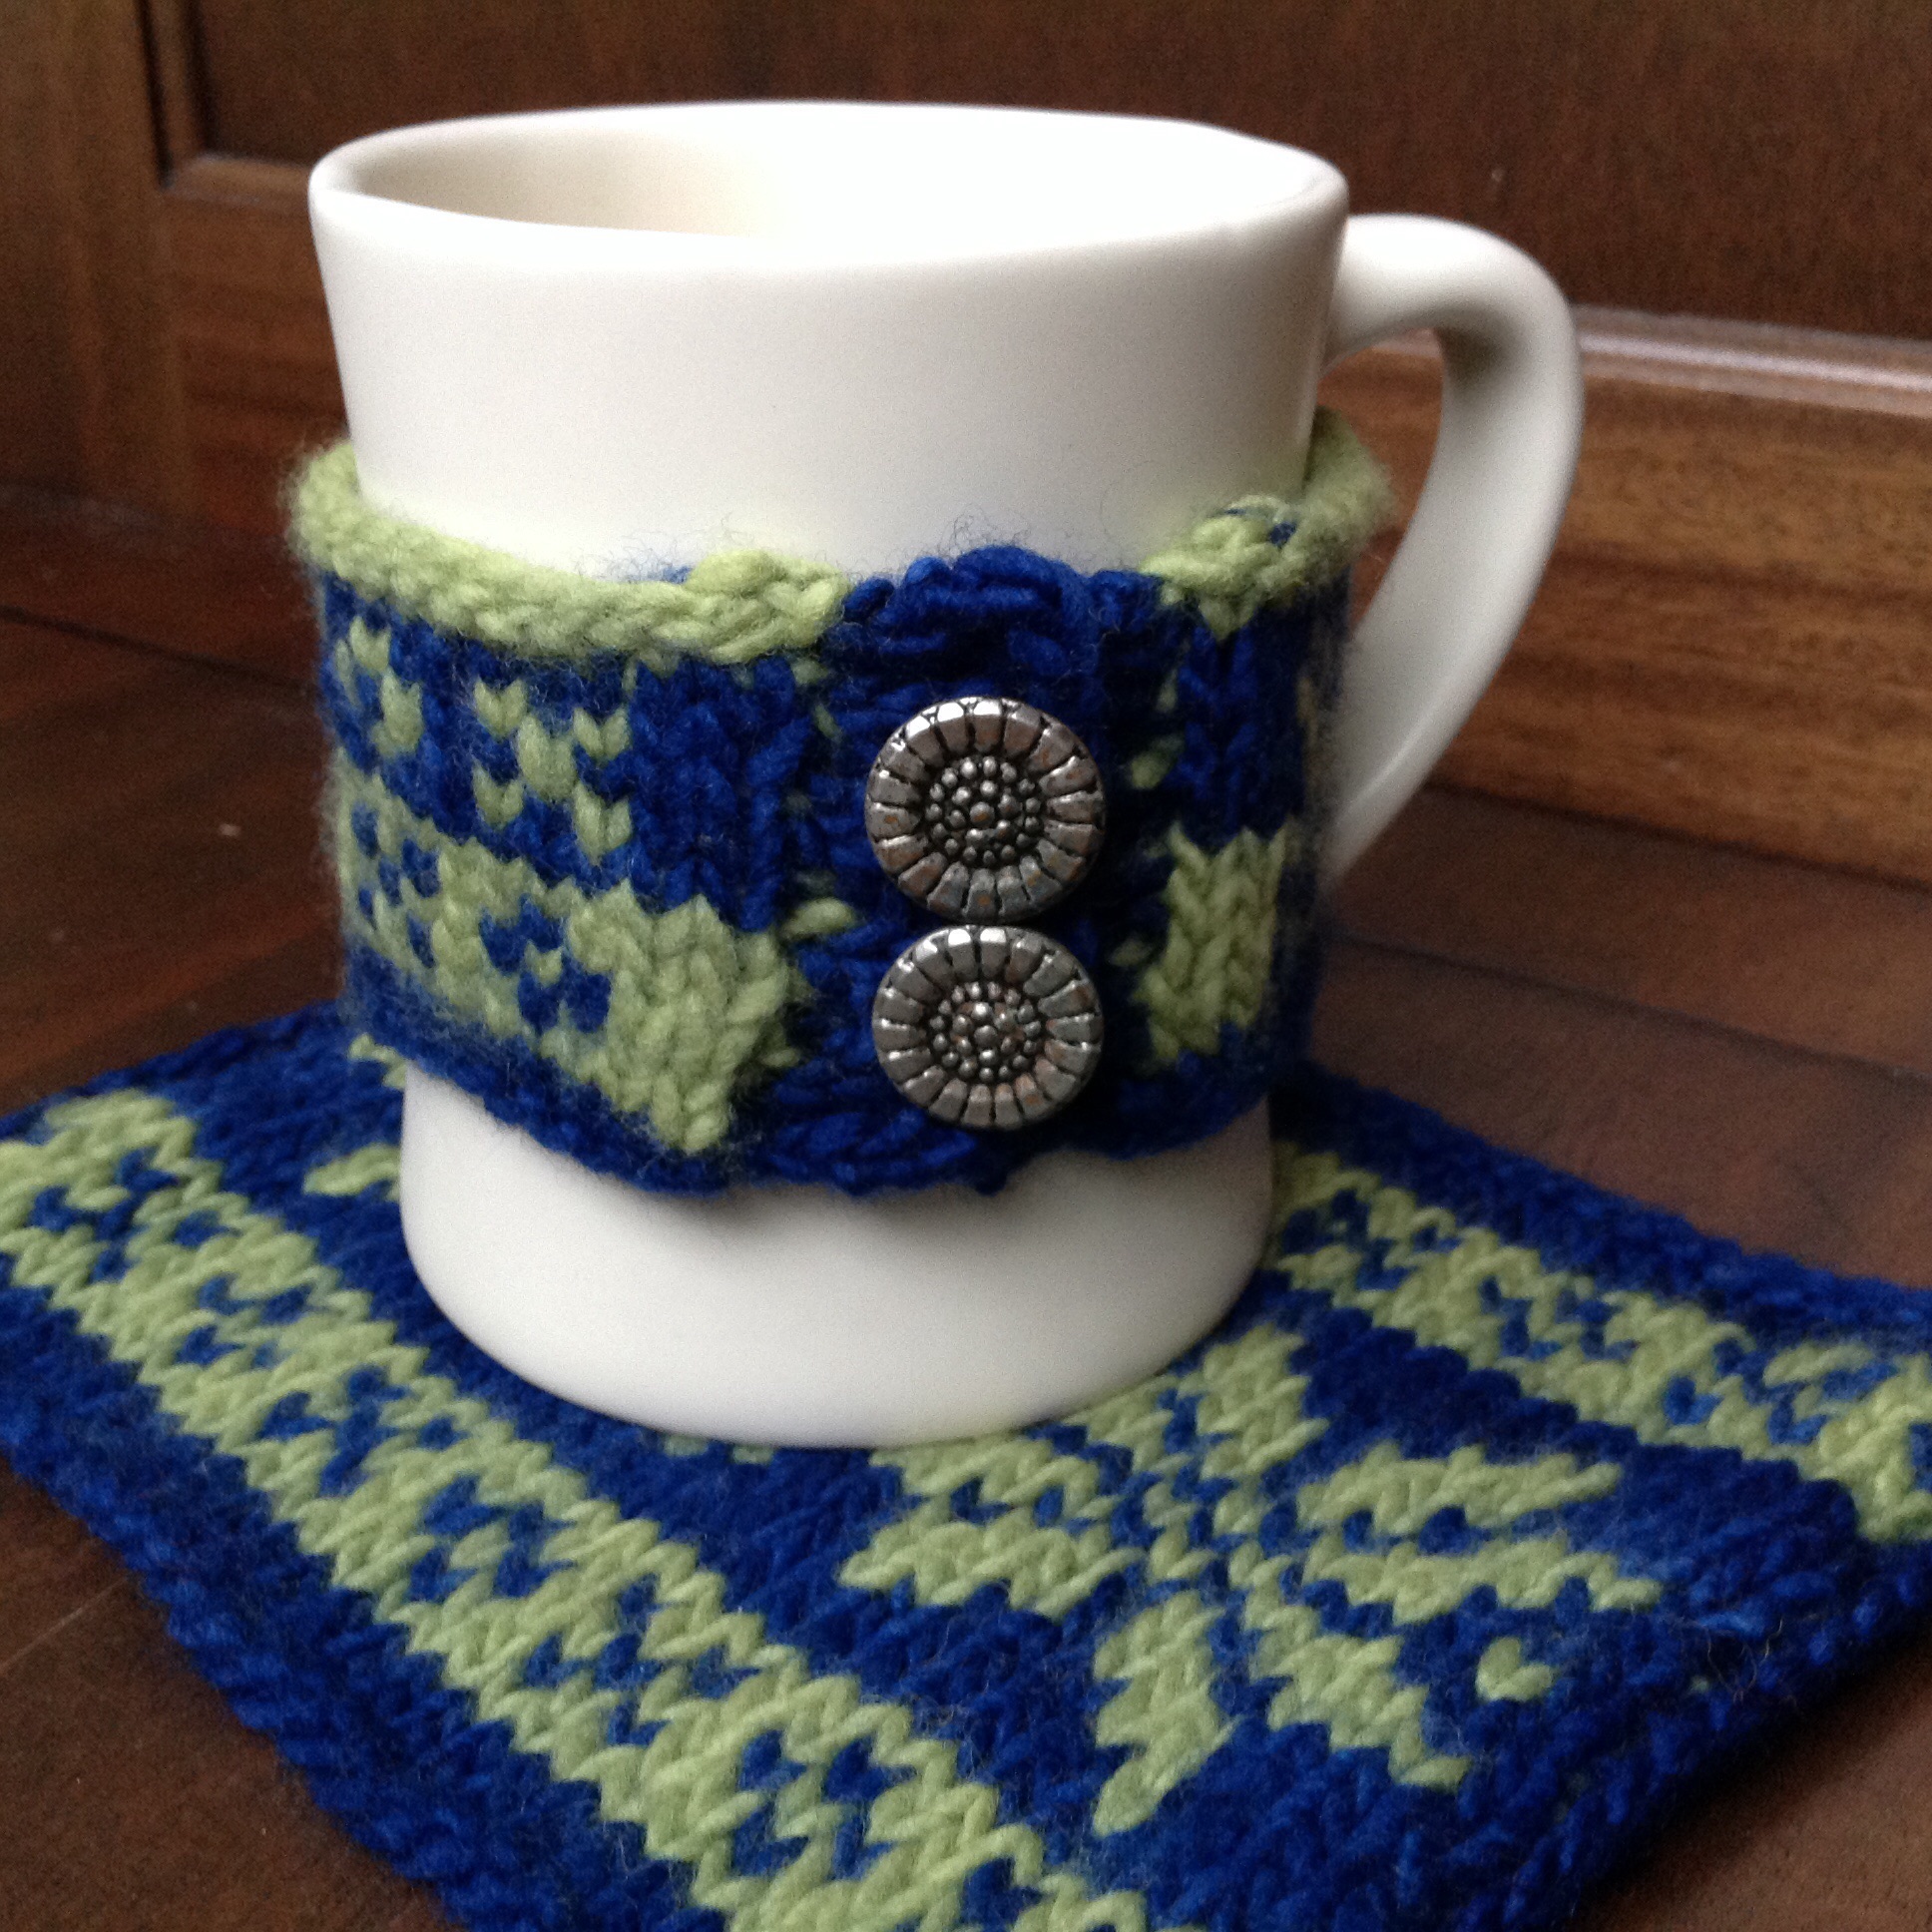
This edge feels more stable than the sewn one. It’s good for armholes and button bands that will roll to the wrong side of your knitting. And in good non-superwash wool, it will eventually felt to itself and you won’t have a care in the world. It doesn’t need to be covered. You could choose a coordinating color for the crochet stitches, and have that be a secret feature on the inside of your knitting.

On to the third steek! This one was sewn by machine. It’s not as pretty as the crocheted one, but it’s very stable and would work for any kind of yarn, including a non-sticky wool or other fiber that wouldn’t hold as well with the other two methods. My personal favorite to work is the crocheted steek, but the machine sewn steek would work for everything, and the crocheted steek might not. (Hmmm, I don’t have a picture of this one. I must have been too ready to cut!)

All in all, a wonderful and empowering class. And after class, we got to check out Mary’s samples from her new book, Teach Yourself VISUALLY Color Knitting, that’s coming out next month.

samples

embellish

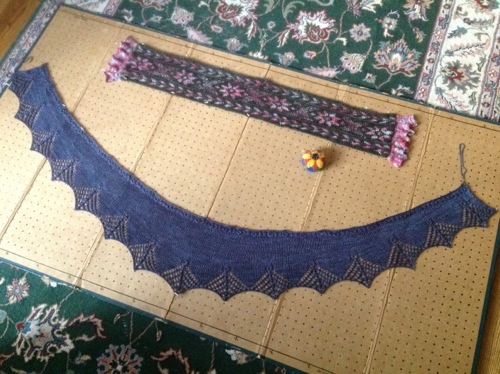
After class, Cathy and I celebrated.

afterparty

(See the crocheted steek with the garter stitch edging done?)

I was singing in church that morning, so I only had 30 minutes in the market before class time, but I did manage to say hi to Brooke (SincereSheep) and Lorajean (KnittedWit). Brooke is wearing her Pointer hat!

amongfriends

All right; you’ve seen my steeking adventure. Do you want to steek? Let’s do it!

Paying it forward, and other bloggy fun

I’m a fan of the blog Eskimimi Makes; she’s always creating something fun. Now she’s participating in a creative “pay it forward” project, and I am, too. Here’s the scoop, as slurped from her blog:

1. I will send a surprise gift to the first three commenters on this post. The gift will be handmade by me. It will be sent sometime in the next 365 days. It will be a surprise. We all love getting surprises in the mail, right?

2. To sign up and receive a gift, you must play along, too. Pay it Forward on your blog, by promising to make a surprise for the first three people who comment on the post.

3. You must have a blog (that is updated, as I will blog stalk you to find the right gift for you).

4. After commenting here, you must repost this or something similar to your blog in 48 hours. If not, I will chose the next person who comments…

Sound like fun? Want to play? If you would like to receive a little handmade gift from me at some point in the next 365 days and agree to take part on your own blog and pay it forward, then leave your details below. If you’re one of the first three respondents, you’re in! If you’re not in the first three, pop over to the blogs of the first three respondents here (remember, there are 48 hours after your comment appearing here for you to post the Pay It Forward on your own blog, otherwise I will move on to the next person). I’m happy to accept respondents worldwide, too.

Let’s do it!

What else is going on this week? It’s been a numbers heavy week. Taxes at the beginning (and they weren’t quite right the first time, so back to the accountant for a swap), and then tech editing for someone mid-week. Lots of numbers there, because the stitches have to add up, and the garment has to match the schematic! This is the only kind of math I like.

Here’s what I’m knitting this week. Can you guess what it is?

P1050853

Well, yes, it looks like a hat, and it would actually be a good one, because the stranded fabric is nice and dense and would keep the wind out. But it’s not a hat. It’s my homework for a class I’m taking on Sunday at Columbia Gorge Fiber Festival. The class is Eeek! Steeks! with Mary Scott Huff. I’m going to be cutting this knitting up…on purpose. I’m looking forward to it! There’s still room in the class if you want to come, too. Check out the Columbia Gorge Fiber Festival website for more info. Not up for class? Come out for the market this weekend!

Also, do you see the little blurry picture on the laptop screen behind the knitting homework? It’s for the third annual Knit and Crochet Blog Week, which begins April 23. Do you want to play along? You’ll find the topics listed on this page. These links are all for Eskimimi Makes, so it’s a very Eskimimi post today!