My friend’s brother lost his home in the Santiam Canyon wildfire last fall. He did save these socks, which his wife knit for him. She passed away earlier last year, I think. I want to mend these socks for him, so he can continue to wear them, as a remembrance.
I plan to use duplicate stitch to reinforce the intact heel on the left. My options for the blown out heel on the right? Either darning/weaving, or knitting a patch, per Google search. I’d much rather knit than weave, so a knitted patch will be my first attempt. I found instructions for duplicate stitch, darning/weaving, and a knitted patch on this website from the Woolery.
I found a reasonably good yarn match in my leftovers bin. Now I have to resolve to some knitting on tiny needles, which is not my favorite thing! But worth it for a mitzvah, right?
Have you repaired socks before? I’ve repaired socks using duplicate stitch before the yarn gave way, but not after as big a hole as this one. Any advice appreciated!
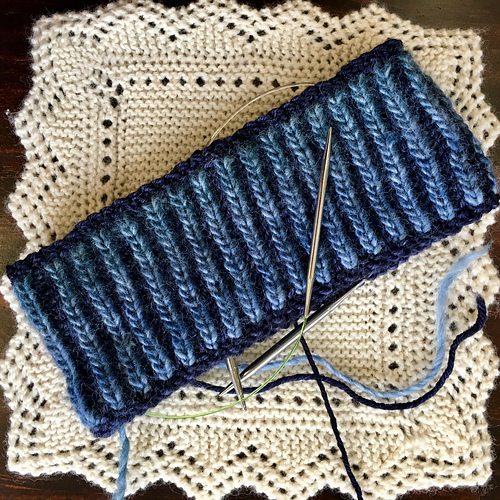
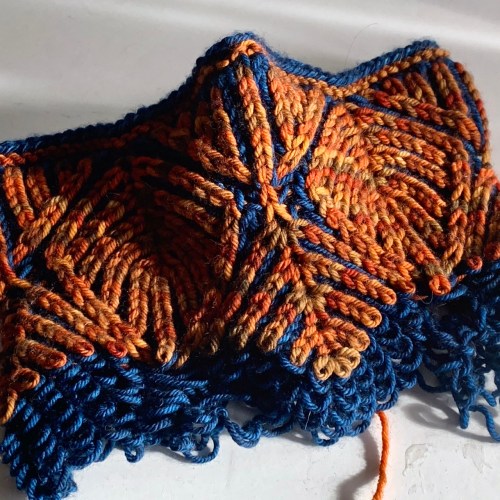
It’s been a very busy couple months, but I’m back on track. The Leafy Origami Hat is ready to rock and roll!
The Leafy Origami Hat is 2-color brioche, knit in the round from the bottom up in worsted weight yarn. It was inspired by my Leafy Origami Cowl, and it features a smaller version of the leaf stitch pattern that falls into mountain and valley folds, just like origami.
The beginning of the round moves forward and backward on several rounds, making this a challenging brioche pattern. I’ve made several video tutorials to guide you through the increases, decreases, and moving the markers. The stitch pattern is adapted from the Under Dutch Skies stitch pattern in Nancy Marchant’s book, Knitting Fresh Brioche.
I’m having a pattern launch sale, use coupon code leafylaunch for 15% off the pattern through Feb. 2, 2021. This code works on both Ravelry and Payhip.
This pattern is available through Ravelry, link here.
This pattern is available from my Payhip shop, link here.
Thanks to tech editor Meaghan Schmaltz, and test knitters Ann Berg, Debbie Braden, Megan Drake, Elizabeth Forester, and Jacqueline Lydston.
I love these leaves. I’m still knitting on my mega-cowl version, but it’s on the back burner until I finish DH’s Dreyma sweater. I just started the first sleeve!
It’s amazing how much progress you can make if you concentrate on one project, and that’s why I’m pretty much a monogamous knitter. Two projects at the most, so that there is always a mindless project and a mindful project. I’ve had 3 projects on the needles lately (Dreyma, Leafy Origami, and Katie’s Kep) which means I’m not good at getting progress on all of them at the same time! But now Dreyma is on the stockinette sleeve portion, which is truly mindless, and I’m using that for Zoom meetings and home knitting. It’s too big to take on appointments outside the house now.
I’m so pleased to announce that I’ll be teaching a series of brioche classes with Bazaar Girls Yarn Shop and Fiber Emporium! We’ll begin with Petite Brioche, 2 color brioche in the round, in February. We’ll work our way through more advanced techniques in following months. I’ll walk you through step by step until you’re a brioche pro!
Petite Brioche is a gentle introduction to 2 color brioche rib. We begin with a simple long tail cast on, so there’s no special fussing to get started. I want to make sure you have a successful experience.
The first class is Saturday, February 20, from 11 am to 1 pm Pacific time. The Bazaar Girls shop is in Port Townsend, Washington, but through the magic of Zoom, you can take this class from anywhere in the world. Come knit with me!
Well, I didn’t finish DH’s sweater in time for his birthday yesterday; I got sidetracked by that new smaller leafed Leafy Origami Cowl. I decided to set the cowl down and do some mad knitting on the sweater.
Four episodes of Bridgerton later, it was long enough to consider hem options. DH doesn’t want patterning at the hem, just ribbing, so I had a bit more knitting to do. No problem. (For those who know that I was saving Bridgerton as treadmill incentive, I decided getting this sweater done was more important. I’ll pick a new incentive.)
The hem is just 1×1 ribbing, and I’m using Patty Lyons’ “What the Flip” method of transitioning into the ribbing so that the hem doesn’t flip up where the stockinette meets the ribbing. Basically, on the first round of rib, slip the knit stitches (purlwise with yarn in back), purl the purl stitches, and then work k1p1 ribbing on subsequent rounds. Easy enough! I don’t know that this hem was going to flip, but why not just avoid the whole issue?
The hem should be done tonight, and then I’m headed for Sleeve Island.
Even without his new sweater, we had a good day. We went to Mt. Tabor for a walk/hike to the top of this extinct volcanic cinder cone. Volcano in the city!
There are several city water reservoirs on Mt.Tabor that will eventually be decommissioned in favor of new covered reservoirs, but these are so pretty.
The kids made lasagna Bolognese from J. Kenji Lopez-Alt’s Food Lab book, and it was fabulous. Lots of interesting ingredients including anchovies and fish sauce for perfect umami flavor.
I made a pear tart and bourbon caramel sauce for dessert, both old favorite recipes. All was traded back and forth on the porch, since we’re still distancing. Looking forward to a Covid-19 vaccination someday soon.
We love knitting brioche. But sometimes things happen. I’m launching a new Zoom class, Brioche Doctor: Fixing Mistakes in Brioche. We’ll go from finding simple missed yarn overs all the way through frogging and getting back on the needles. Class will be on Saturday, February 13, 10:30 am to 12:30 pm, Pacific time. Registration is through Twisted Yarn Shop.
We’ll be working with a flat 2 color brioche swatch, but even if you’ve only ever done brioche in the round, this should be pretty accessible for you. I love new classes, and I think this one will be lots of fun. Come tink, drop, and frog with me!
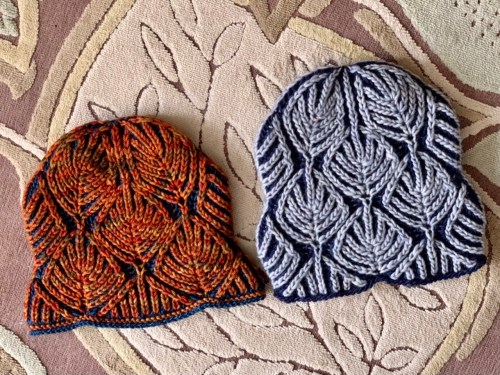
I knit the hat on the left, while developing the hat on the right (pattern next week; I just need pictures). The first hat wasn’t what I wanted, so I frogged the crown and re-finished it as a cowl. Yes, you *can* frog brioche and get it back on the needles!
Side conversation: I’m working up a Brioche Doctor version of my Tink Drop Frog fixing mistakes class; I’ll let you know when that goes live.
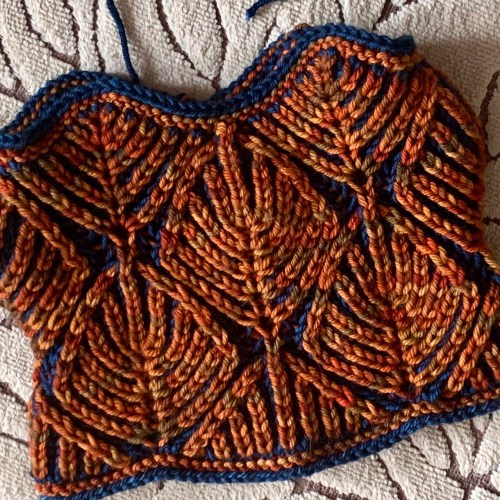
Done. I love these leaves, and I had enough yarn leftover to knit one more cowl. I decided to play with the smaller leaf that I worked out for the blue hat. But! What if I made it a longer (wider) loop, too? That’s really my preferred cowl style, long and hanging down, not so much up around my neck. I’d need this yarn back to do that, though.
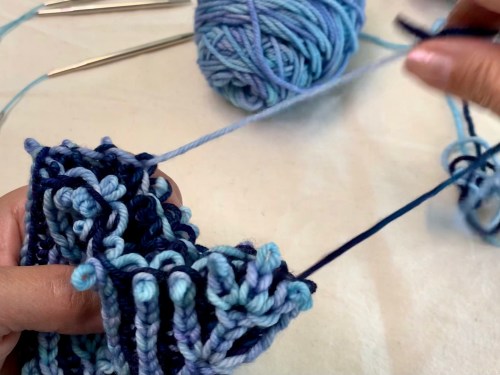
To the frog pond! You know that brioche is a two sided fabric, in separately worked layers. Did you know you can frog one color at a time, leaving the other color behind? This looks so cool, like a frilly petticoat peeking out under a skirt.
Almost there…
I have the new cowl about halfway done, which means it’s the traditional time where I start second and third guessing myself. Should I make the leaves even smaller? Do just I add this version on to the existing cowl pattern, or make a new pattern? I think the answer to that depends on how much extra work goes into it. Right now it’s just using the new smaller leaf from the hat, but if I make the leaves even smaller, it would be a ton of work to redo the chart and written instructions *again*, so it would want to be a separate pattern. Diminishing leaves, diminishing returns?
Really, I just need to finish knitting this so I can move on to a couple shawl ideas that are buzzing in my head. It’s time to get 2021 on the road!
I had a great weekend teaching at VKLive. I love teaching, and it was especially fun to teach my revamped YO? YO! Fun and Fancy Elongated Stitches class. I got to become reacquainted with some of my favorite designs.
I also had the chance to be a student again, this time in Laura Nelkin’s Beaded Brioche class. Two of my favorite techniques in one class!
Laura explained how she decides where to bead her brioche stitches (hint: make a pattern swatch first and visually decide where you want them). She went on to show how to either place beads via crochet hook or pre-string them. The beads in this sample are placed, but I used my trusty Bead Aid. rather than a crochet hook. In real life I’d like more contrast than there is here, but I was working with leftovers from other projects.
I usually place my beads *before* working a stitch, and couldn’t visualize how to do this on a brioche knit stitch. Laura places her beads *after* working the stitch. That makes a lot more sense for brioche; then it’s just like placing beads in any other knitting. Easy peasy! I’m looking forward to adding beads to my next brioche shawl or scarf.
I also attended the Rowan High Tea (BYO beverage); it was fun to learn about all the ways tea is enjoyed in different regions in the UK. And I knit this peach while watching! It’s stuffed with yarn scraps that I collected while sewing in ends. Reduce, reuse, recycle! The pattern is free from Anna Hrachovec at MochiMochiLand, if you’d like to knit your own peach. Mine is knit with Malabrigo Worsted on US3 needles, so it’s not as tiny as hers. You can see it in the second picture, which gives a better sense of scale. I used my Flexi-Flips which made it work up very quickly; I was done before the tea ended!
I‘ve finished the colorwork on DH’s Dreyma, yay! I worked the short rows using the German short rows that I learned in classes with Bristol Ivy and Ana Campos at December’s VKLive. One thing that was slightly confusing was that we learned to make and resolve short rows either on the right side (knit) or the wrong side (purl) but we didn’t discuss resolving short rows made on the purl side but resolved on the knit side when knitting in the round. I found this tutorial by Patty Lyons which worked fairly well, but one of my short rows resulted in a hole…that I’ll just sew up later. Git ‘er done!
I’ve divided for the sleeves and body, and it’s just stockinette for miles for a while. This is perfect for knitting while waiting for classes to start, or during Zoom meetings, or even while reading. But I must admit, I was too captivated by the inauguration ceremonies this morning to knit. Congratulations to President Biden and Vice President Harris!
Pearls and pjs
Leftover bacon/arugula/pear/blue cheese pizza with poached egg for breakfast. Soooo good. My favorite aunt (the one who taught me to knit!) sends me pears every year, and these are spectacular.
I had my first Katie’s Kep class on Sunday for For Yarn’s Sake, and we had a great time. We started off with a chat about size and gauge. I think that’s especially important with this project, which is prescribed to be 22” around. You can see how much smaller my second kep will be, and you can also see how lovely the fabric is after blocking. Blocking is magic, both for this yarn and for stranded colorwork in general.
Even though I’m reducing the circumference, the top will still have this lovely six pointed star. Math!
The hat pattern is free from Shetland Wool Week if you’d like to make your own. Also, I’ve added a third stranded colorwork Zoom class through For Yarn’s Sake on February 28 for this project. Register here, if you’d like to start your kep with me and a small group of knitters. We’ll talk about sizing, gauge, how to manage your yarns, yarn color dominance, and more! If you need yarn, For Yarn’s Sake also has kits for this project in 5 colorways. I found that very helpful!
Shetland Wool Week also has patterns for a cowl and fingerless gloves that coordinate with this hat; you can purchase them here.
I find the small color pattern repeats in each round to be very soothing, meditative knitting. Not a bad thing in these turbulent times. So far, 2021 is on a pace to outrun 2020. Yikes.
For Christmas, we gave the kids a private Zoom class with our favorite local chef, Jenn Louis. She has had several restaurants here in Portland, and has several cookbooks out, too. Their choices were: handmade pasta, paella, or tamales. They felt that paella was the dish they would probably make again on their own. Good call!
Jenn even lent us paella pans for the event. So perfect! I did all the shopping; it was like making a meal kit for the kids. They’re in a Covid bubble, as are we, so we had two houses cooking together, apart.
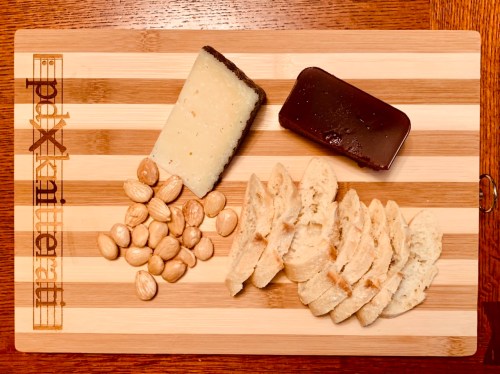
Jenn planned the whole meal. We had some nibbles before dinner: Manchego cheese, quince paste, marcona almonds and baguette.
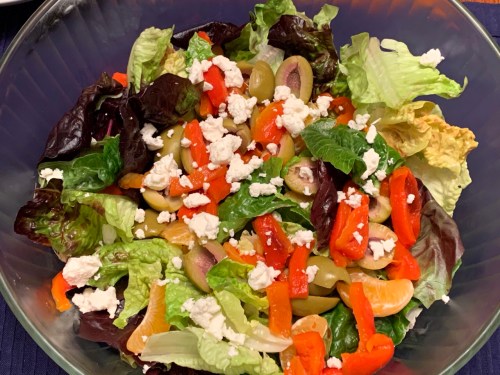
Salad with roasted red pepper, olives, tangerines, lemon vinaigrette (and some goat cheese left over from the dates)
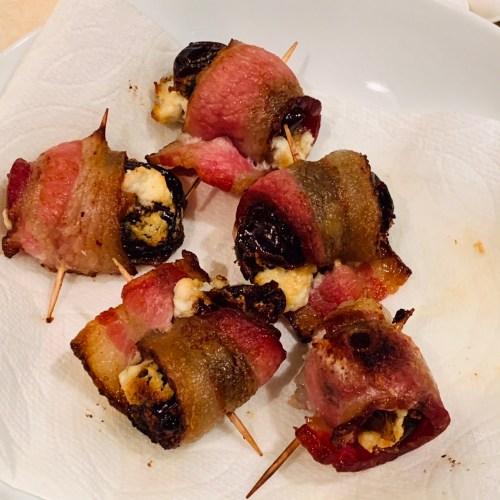
Bacon wrapped dates, stuffed with goat cheese.
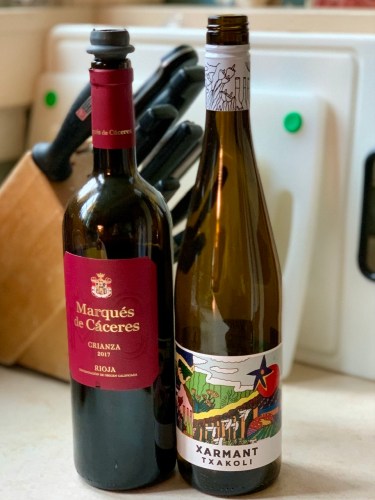
The kids bought these delightful Spanish wines, red and an effervescent white. They were a perfect pairing with our dinner.
Are you hungry now? Jenn has graciously allowed me to share the paella recipe, below. She also said that we could do this in a large skillet, if we didn’t have paella pans. (I’m not sure I really have room to store one, lovely as the are.)
Paella with chorizo and shellfish
SERVES 4 1⁄4 cup [60 ml] olive oil, plus more for finishing 4 ounces [115 g] chorizo, roughly chopped 8 ounces [230 g] mixed seafood of your choice 1 yellow onion, diced 2 cloves garlic, thinly sliced 2 tablespoons sweet smoked paprika 1 cup [200 g] Calasparra, Valencia, or Bomba rice (short grain, arborio works, too) Small pinch of saffron threads (about 1⁄2 teaspoon) 2 tomatoes, cut into 6 pieces each and most seeds removed Fine sea salt and freshly ground black pepper 4 cups [960 ml] chicken stock or water, plus more as needed (edit: now that I’m doing this in my skillet rather than a wider, shallower paella pan, I’m going to start with 3 cups. I can always add more if the rice isn’t done enough.)
Warm the olive oil in a 13 1⁄2-inch [34-cm] paella pan over medium-high heat. Add the chorizo and cook for 2 minutes, then add the onion, garlic, and paprika. Cook until the onion is translucent, about 3 minutes. Add the rice and saffron and stir to evenly coat and toast the rice, 4 to 5 minutes. Add the tomatoes and cook until they become warm and begin to fall apart, about 3 more minutes. Season with salt and pepper.
Evenly distribute and flatten out the rice in the pan and then add the stock. Turn the heat to high, taste the broth, and adjust the seasoning. Bring to a simmer, then decrease the heat to a medium simmer and cook, rotating the paella pan every 2 minutes, for about 20 minutes, until the rice is plump and cooked. Taste and adjust with salt and pepper.
After 10 minutes arrange the seafood on top of the rice and continue to cook until the seafood is done. (edit: I’m adding seafood when the liquid is down to the rice level)
Keep the paella over high heat and continue to rotate the pan every 2 minutes to create an evenly crispy bottom, (known as socarrat). Add additional chicken stock or water as needed to fully cook the rice. (edit: my super conductive Cuisinart pan doesn’t need to go to high heat; I don’t want it to scorch!)
A very pretty dinner, indeed!
I love gifts that are consumable, and leave no clutter behind. This was exactly right. And we all got to hang out together on Zoom, still socially distant. I’ll be so glad when they can just come over for dinner again, but this was a great alternative. Thanks to Jenn Louis for the recipe and the class!
Jenn’s latest cookbook is The Chicken Soup Manifesto; I gave a copy to my sister Sharon last year.
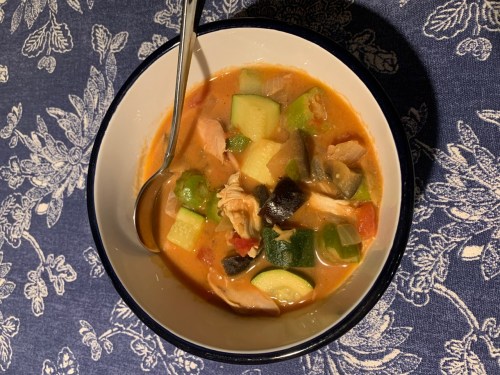
Burmese Chicken Noodle SoupChicken Mafè (West African)Chicken gumbo
She’s on a roll! (Soup photos are courtesy Sharon Hsu. And I don’t know why the first two turned sideways when I uploaded them?)
The crown is definitely the star of the show. Absolutely gorgeous. Both of these pictures are pre-blocking.
I didn’t knit to gauge, but I’m not willing to knit a hat on smaller than US3 needles. The hat is supposed to be 22” but mine is 23” instead, and 9” tall. I don’t swatch for hats. I go by Meg Swansen’s maxim that the hat will fit *someone*! My first hat is a great big gauge swatch.
I’m knitting a second hat, with one fewer repeat of the body stitch pattern. My kit from For Yarn’s Sake has enough of all the CC yarn for a second hat, if I buy an extra ball of the main color, which I did. (There are 5 colorways to choose from.)
I’ve adjusted my cast on, too. I know how to get the crown to work out, based on my reduced number of stitches. Math tells me that my new hat will measure 19”, which gives me some negative ease to help keep it on my head. I might try to remove a few stitches to make it a bit shorter…or not. When it stretches out to accomodate my 22.5” head, that will also make it shorter. Fabric has to come from somewhere! My hats are generally 8” tall.
I’m teaching a Zoom class for For Yarn’s Sake this Sunday, and again later in the month, based on this pattern. (Classes are full. Should we schedule a third class?) We’ll start the class with a discussion on gauge! We’ll also talk about swatching, or not, and ways to adjust the size of the hat. I’m really looking forward to it!
In other class news, I’ve picked a winner for a free class with me at January Vogue Knitting Live. It’s Lauri T! I’ll email her and let her know that she’ll be in my YO? YO! Fun and Fancy Elongated Stitches class. I’m pretty excited about that one, too. I just re-vamped the handout for class, adding more fun stitches. We won’t get through them all in 2 hours, but the handout is a good reference and jumping off point. Congratulations, Lauri!
What new knitting skill do you want to learn in 2021?
Find my patterns on Ravelry: Michele Bernstein Designs
Here are some of my favorites, and the newest. Many of my designs are also available through my Payhip store.