Dreaming of Spring

I’ve been haunting the Portland waterfront this month, waiting for the cherry trees to bloom.

The top picture is 2 weeks ago, and the bottom is from March 31, 2019. Hoping next weekend is peak!

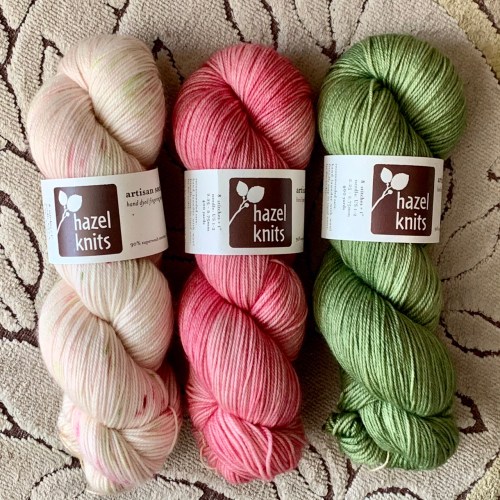
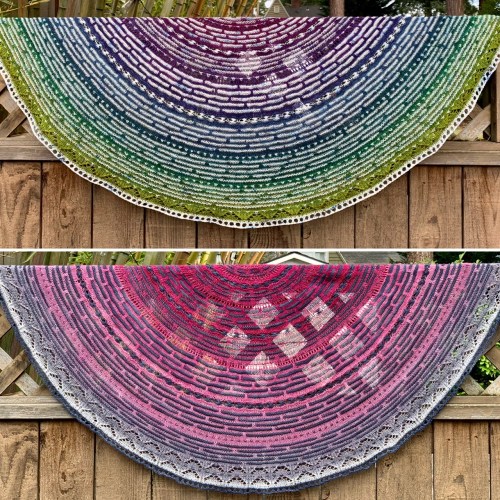
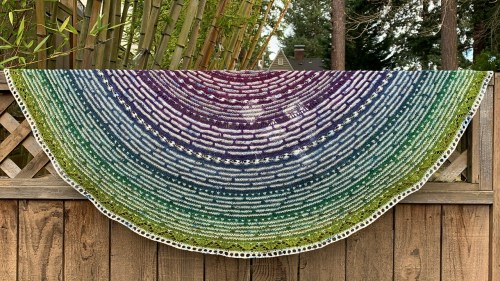
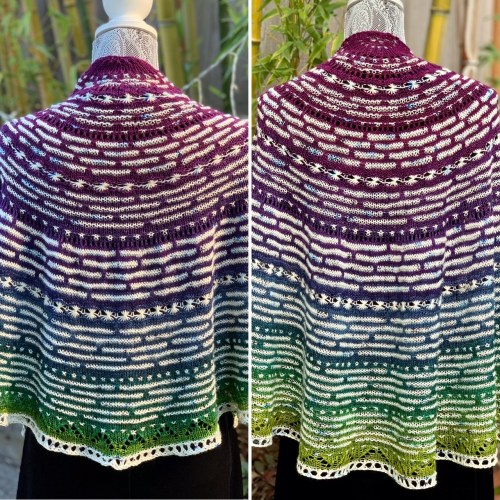
This color palette is on point!

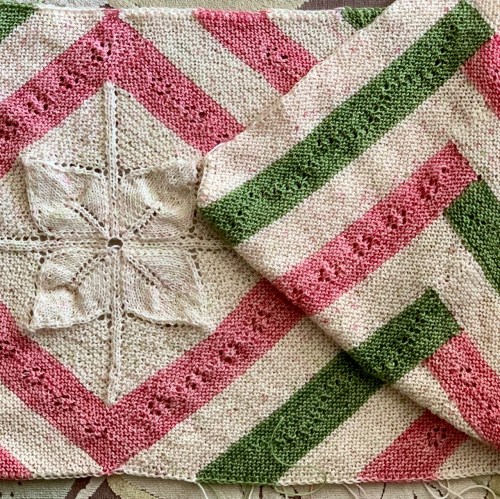
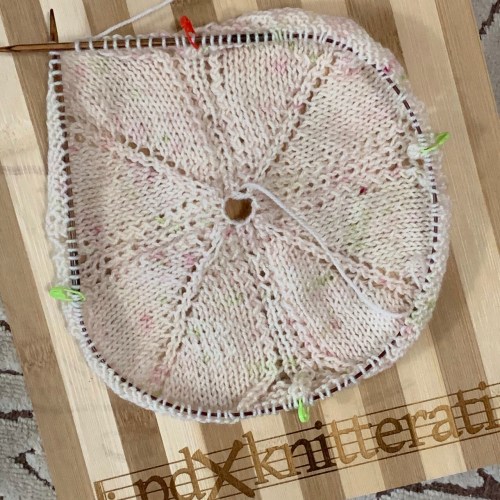
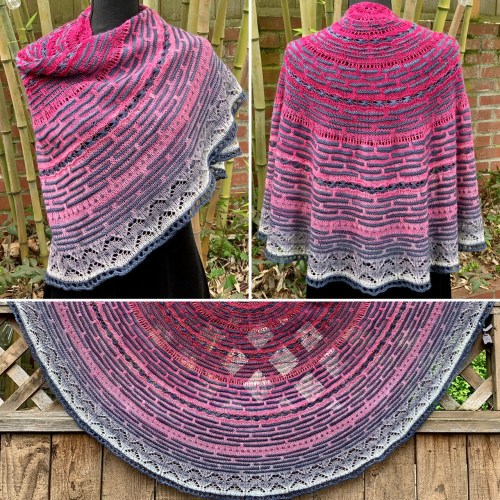
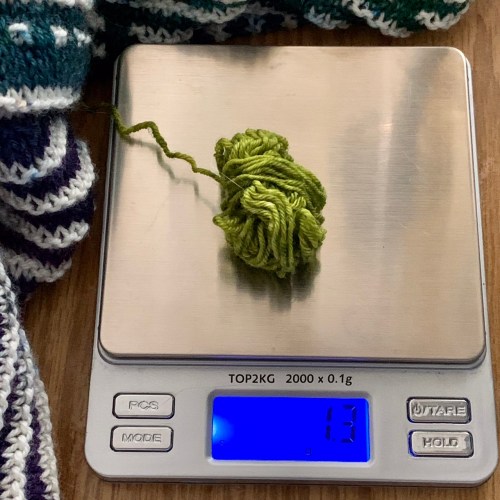
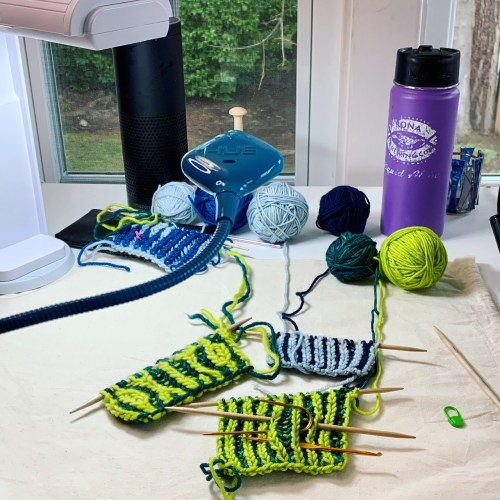
Here’s a peek at what it’s becoming. I’m so pleased with this. After my adventure with the Pythagorean Theorem and the hypoteneuse, all is well! I don’t regret frogging those 11,000 stitches at all. I’m just over halfway done with this. Pattern coming soon.

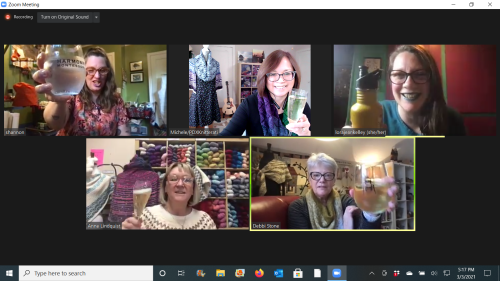
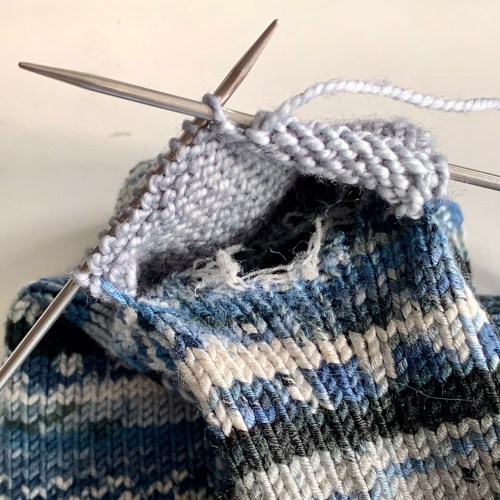
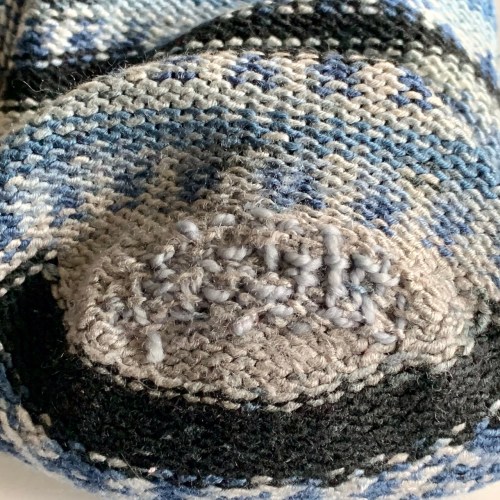
I didn’t get much knitting done this weekend because I was teaching for Vogue’s Virtual Knitting Live. I debuted my new Darn It! class, which was really fun! Mending and even more visible mending. This all started with that sock mending project for a friend; it was so much fun I wanted to share my new skills. I’m teaching it again through For Yarn’s Sake on April 25, registration on this page, soon.

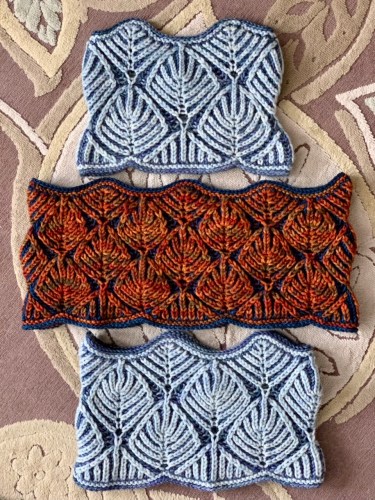
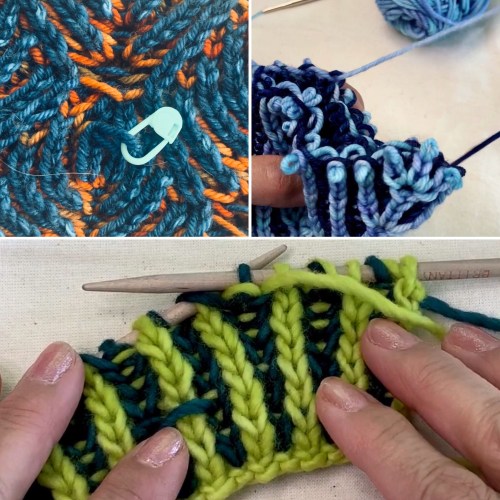
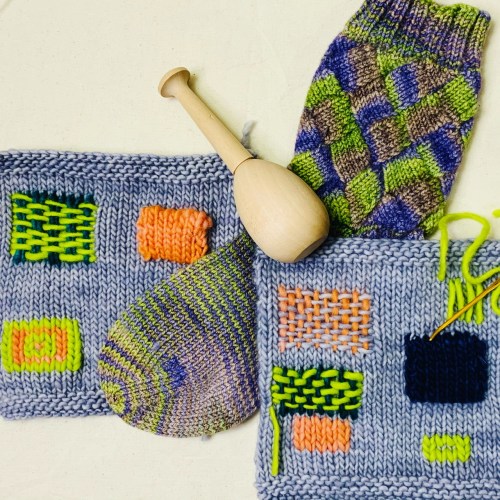
And we also launched Brioche Doctor. This covers reading your brioche knitting, and fixing mistakes. I love that it’s different every time, depending on the questions from my students. We can make this as calm or as crazy as you want! I like having several samples so we can play with it different ways.

April classes are booked; I’m looking forward to teaching Brioche Doctor, Tink Drop Frog, Syncopation, and Log Cabin Knitting for Vogue in April. Sign up for their newsletter so you can be notified when registration goes live.

I’m also teaching a slightly longer Syncopation/Syncopated Brioche class for Bazaar Girls Yarn Shop on April 3. I’ll walk you through flat brioche instead of assigning it as homework, before getting to the syncopated brioche. Class is a little longer than the VKL classes to accommodate this. Register here!

I have classes with Twisted and For Yarn’s Sake in April, too. Sign up for my newsletter for the most complete list of classes, plus knitting news, tutorials, and the best discount on my new pattern releases. I try to keep my Workshops and Classes pages updated here on the blog, but there’s no way to let you know about updates on that.

Knit on!

Rose City Yarn Crawl starts today!

Rose City Yarn Crawl, Portland’s premier yarny event, begins today, March 4, as usual. But it’s not business as usual, because the crawl is going virtual this year, with an extended crawl March 4-14.

I usually kick off the crawl at For Yarn’s Sake with owner Anne Lindquist, Knitted Wit dyer Lorajean Kelley, and designers Shannon Squire and Debbi Stone (Ravelry link). This year we toasted virtually in a Zoom we recorded last night. You can see our chat online on the For Yarn’s Sake RCYC page here. And you can find our trunk shows for the crawl on the same page. I’m featuring 7 designs. Six are new this past year, and Lucky Star is an older favorite that Features Knitted Wit’s yarn.

My Half the Knit Sky design is being offered as a yarn kit with gradient yarn from Huckleberry Knits, another Pacific Northwest dyer. Quantities are limited, so if you want a kit, now’s the time for action! These colorways are Practical Tactical Brilliance and Made you Blush (shop exclusive for For Yarn’s Sake). Pattern is sold separately from the kit through Ravelry and Payhip. Many of our trunk show items are in the shop so you can see them up close, too.

Check out the Rose City Yarn Crawl site for ways to participate and win prizes. And you can even visit the stores in person; it’s just not required this year. This may be the first year in a long time that I’ll be able to visit all eight participating shops, if only virtually!

Best laid plans…

I’ve been knitting along in a dream state with these pretty yarns, thinking of how to make the shawl that I see in my mind. This is Hazel Knits Artisan Sock, in Ticklish, Cherry Blossom, and Fresh Cut.

A lot of my designing is trial and error, so there’s a lot of ripping and re-knitting. But I learn something every time I rip. I’ve been knitting away, thinking, and it was time to figure out how how big this would be. I used the Pythagorean Theorem. When’s the last time you thought of that? The hypotenuse is the magic number here.

It turns out I had made the beginning way too big. I wouldn’t have enough yarn to finish if I kept going. So I frogged the 11,000 stitches that came after this. Which was fine, because I used those stitches to map out what I want to do, see how things would fit together, and decide what the stitch patterns should be. And it was a really big gauge swatch, too. I took a lot of notes along the way, and now I’m well on my way. At least I think I am!

My current workspace is not too shabby.

Are you a ripper? I really don’t mind it, if I get what I want, eventually.

Half the Knit Sky, again

I’m having a trunk show at For Yarn’s Sake as part of this year’s Rose City Yarn Crawl. We’re featuring kits for my Half the Knit Sky using gradients from Huckleberry Knits.

This colorway is called Made You Blush, and it’s an exclusive at For Yarn’s Sake. It’s paired with Manos Alegria in Pewter in the kit. You can start your gradient ball at the white end, or the pink end, knitter’s choice! Test knitter Ann is now a sample knitter, and she sent it to me for blocking. You may recognize my fence.

The other kit features the Practical Tactical Brilliance colorway, which is a favorite of mine. Scarlet says that she made the new batch a little bluer than this at the end, to be even more like the aurora borealis. I can’t wait to see it. The contrast color in this kit is Madelinetosh Twist Light in Stormborn. Both kits go on sale on March 4.

Rose City Yarn Crawl begins on March 4, and runs through March 14. I’ll pop up another post with a link to my trunk show when it goes live. There will also be a recorded Zoom interview with my other trunk show buddies, Knitted Wit (Lorajean Kelley), Shannon Squire, and Debbie Stone. I just wanted to show you the pretty pink shawl!

Introducing: Leafy Origami Loop Cowl

Oh, brioche leaves, I just can’t quit you. After the original Leafy Origami Cowl, and then the Leafy Origami Hat, I just had to do one more. A longer cowl (which is really how I like to wear them), with a smaller leaf pattern that I worked out for the hat, which means more leaves on the cowl. This is the Leafy Origami Loop Cowl, and I love it.

Do you like your leaves big and bold, or smaller and…more numerous? Do you like your cowl as a small neck warmer, or a long loop? So many questions, so many options. The new Leafy Origami Loop Cowl can be anywhere from 20” to 36” in circumference, using the smaller leaves that I worked out for the Leafy Origami Hat. But that didn’t seem fair to the first cowl, so I updated that pattern to be from 18” to 32” using those bigger leaves.

This cowl is 32” long.

And this one is 36” long. I love how leafy they are.

Calvin approves!

The Leafy Origami Loop Cowl pattern is now available through Ravelry and Payhip. Use the code LEAFIER for 15% off through March 3, 2021. If you previously purchased the Leafy Origami Cowl pattern through Ravelry you’ll receive an update to that pattern for a longer loop (check your email or Ravelry messages), along with a coupon code for a free copy of the new Leafy Origami Loop Cowl pattern, now that there are more options.

Don’t forget, there’s a Leafy Origami hat, too.

Snow day

And now my dreams are turning from winter to spring…

New Classes: Darn It! and Brioche Doctor

I’ve been having so much fun mending my knits, I decided to develop a class to share the love. Darn It! There’s a Hole in My Knitting makes its debut at the March Vogue Virtual Knitting Live. Registration for VKL is now open:

I’m also teaching Brioche Doctor: Fixing Brioche Mistakes, another new class. And I’ll be teaching Petite Brioche and Syncopation, and giving my lecture on Blocking: It’s Magic! A full slate of fun for me, and for you, too.

I had a great time teaching Petite Brioche for Bazaar Girls Yarn Shop on Saturday, so much brioche success! My next class in the series is Deep End: Brioche Increases and Decreases on Saturday March 6, which is coming right up. You can choose your project: Deep End Hat, Deep End Cowl, or Madrona Cowl, and the pattern is included in the class fee. Register here.

So much going on around here. Onward!

Half the Knit Sky, encore

The Rose City Yarn Crawl is coming up next month, and I’m having a trunk show at For Yarn’s Sake! The crawl is virtual this year. You can visit the shops in person, but it’s not required for the crawl. I’m sending over my Half the Knit Sky knit with Huckleberry Knits gradient and MadTosh Twist Light. There *will* be kits, in two colorways. The gradient on this one is Practical Tactical Brilliance, and the other will be Made You Blush, an exclusive for For Yarn’s Sake.

I knit this last year for my KAL, and stopped short of the acid green at the end because I had already added 24 rows to the original pattern. Last weekend I decided to take the edging off and use more of the gradient, so I did! I ripped back all the way through the flying arrows, so I could add a third repeat of that last section of star trails. I then replaced the flying arrows, and finished again. I had 1.3 g of gradient left, yay for yarn scale and not yarn chicken!

Adding this many rows put me just past where I’d need another increase row based on the pi shawl formula, so I was counting on the flexibility of knitting to make it work because I didn’t want an increase so close to the edge. Also, no more yarn! I used a Russian bind off for the refinished edge, because I knew it was going to be quite a stretch blocking the edge out.

Finished size: 60” x 30” pinned out, and it bounced back to 60” x 28” deep when I took it off the wires. It is larger partly from the added knitting, and partly because the first time I blocked it, I did it outdoors on a hot September day, and it was drying very quickly while I was pinning. Now we’re in winter, and I blocked it in my studio. It is the loveliest, airiest thing. Yay!

Before and after. I’m really happy with it!

The Rose City Yarn Crawl is March 4-14; check out their website here.

Dreyma is dreamy!

DH’s Dreyma is as dreamy as its name, and perfect on a snow day!

This yoke is so fabulous. And the built up neckline is much better than where the ribbed neckline ended before. Most of whatever T shirt DH wears underneath is covered, which is way better aesthetically.

I gave the body of the sweater a pretty relaxed fit, just like his other favorite sweaters. He’s been wearing this constantly over this snowy weekend!

We don’t get much snow in Portland, so we make the most of it when we do! One or two snowfalls per winter. And then usually freezing rain on top. But on Saturday it was still fresh and perfect. I brought out my nearly 40 year old ski equipment, and toured the neighborhood instead of using the basement treadmill. Of course I wore my ancient Pippi Hat. I really need new boots, which means new bindings, too; these are very old school.

DH’s ski boots are no longer with us, so we walked, too.

The neighborhood was full of joy. So many smiles after being locked down.

The neighborhood sledding street, busy as always.

And the witch hazel is in bloom.

This is not the only unicorn I saw. The best was a XC skier in a unicorn onesie, complete with a rainbow tail!

How’s your weather? And what am I knitting next? There’s a new design idea on the needles, and a revamp of a previous one. Two projects is probably my limit!

Dreyma neckline drama

Dreyma came off the needles the other night, and we had another check-in with DH. The extra stitches in the sleeve helped a bit with the wonky wide neckline, but there was still a lot of undershirt showing at the neck. Horrors! That’s like my bra straps showing. No thank you. I looked through Ravelry project pages, and others had this issue, too.

Because Dreyma is knit from the neck down, I couldn’t just add to the ribbing at the neck. Or could I? I thought about the following options:

  • Slip stitch crocheting along the back and shoulder, just under the ribbing. That would be easy, but I didn’t think it would be enough to bring the neckline up as far as it needed to go.
  • Picking up stitches at the bottom of the ribbing, and just knitting a taller one that would sit in front of the old one. Doable, but thick and maybe awkward.
  • Cutting off the ribbing and working it bottom up. But the very first round after the ribbing had increases in it, and I didn’t want to mess with those. It could have been disastrous.

Nope, nope, nope. But what if I *did* pick up and work in the opposite direction? The stitches would be facing the other way: the knit stitch Vs would but up against upside down Vs. That actually wasn’t too obvious; you’d have to be pretty close to notice the Vs. But there’s a horizontal line at the pickup. Like this.

Definitely noticeable. Could I hide it? I recently saw a neckline on Mary Scott Huff’s blog, where she has a herringbone braid under her neck ribbing on the dress she’s designing. If I picked up stitches, immediately jumped into a herringbone braid, and then continued with ribbing, that would hide the pickup line.

Except…I decided I didn’t want a Latvian braid on this Icelandic-style sweater. Although I do love those braids.

Ultimately, I decided to try 3 rounds of ribbing, followed by 8 rounds of stockinette. The stockinette will roll and show the purl side. The Dreyma pattern actually begins with a choice of either a rolled neckline or a ribbed neckline. I just happen to have both, by accident. The rolled edge comes *almost* down to that pickup line, close enough that you don’t notice the pickup seam. (I could make it taller, but I was worried it would then do all its rolling way above the pickup.

The sweater is soaking in the blocking bath at this very moment. I can tack the rolled edge down to the pickup line, if I need to. Hoping I don’t. It looks much better on DH now. If there’s any residual undershirt peekage, I’ll try adding slip stitch crochet around the shoulders and back neck.

Bonus: This sweater is super cute on ME, too, as an oversized tunic. FO pictures soon!

Sock repair: Knitted patch

Remember these socks? They belong to a friend’s brother, whose wife had knit them for him. She passed away last year, and I offered to try to mend the blown out heel. I finally had a moment to sit down with this project. It turned into a much larger moment, but it was worth it.

I didn’t recognize the kind of heel in this sock; it’s not my usual flap and gusset, so I winged it. I picked up stitches in a line two rows under the hole, making sure to go a couple stitches past the hole on either edge. I knit across the row, and purled back. From there on, I picked up a stitch at each end of every right side row, to k2tog with the beginning of the row, and ssk at the end of the row to attach the patch to the sock. Purl back. When picking up the next edge stitches, skip up a row (go up 2 rows) to make up for the purl row.

See how my patch had parallel edges? That didn’t quite work. Because of the way the heel was shaped, I needed to decrease 6 stitches as I went up, so that I could kitchener stitch to the smaller number of stitches *above* the hole, since my sides were tacked down with a set number of stitches between. (Still don’t know what that heel shaping was, but there were fewer stitches between the edges when I got there, so I had to rip back and work in the decreases. I think that the new knit fabric is stretchy enough to make up for the missing heel shaping.)

Looking back from the other side. We’re just going to cover up that hole and pretend it never happened.

Here’s the finished patch, kitchener stitched (grafted) to picked up stitches above the hole. Tidy!

Here’s what it looks like on the inside. I used my ends to tack a bit of the frayed fabric to the inside of the patch.

I used duplicate stitch to reinforce the other heel because it hadn’t broken through yet. It looked terrible but I was afraid to pull my stitches out to re-do it, because the threads of the heel were very thin, and I was afraid they would break if I pulled too hard.

I did some darning on the inside to see if that would make it secure, but it still felt pretty weak.

So I did a knitted patch here, too! I worked this one in the opposite direction, so instead of decreases I used increases, and grafted at the lower edge (left sock). Easy once you know how. Everything feels tidy and secure. I put my foot in them, and they feel fine.

Now these socks can go back to their owner. I’m glad I could help.

Have you ever darned or patched socks? I have used a little duplicate stitch on thin spots, but I had never fixed an actual big hole before this. I’m pleased to have this new skill in my tool kit!