Category Archives: tutorial

Gauge hat, free recipe pattern redux

Are you a gift knitter? Were getting down to the wire on deadlines, but a worsted weight hat is still a perfectly achievable gift! I’m repeating a post from 2020 to help you out.

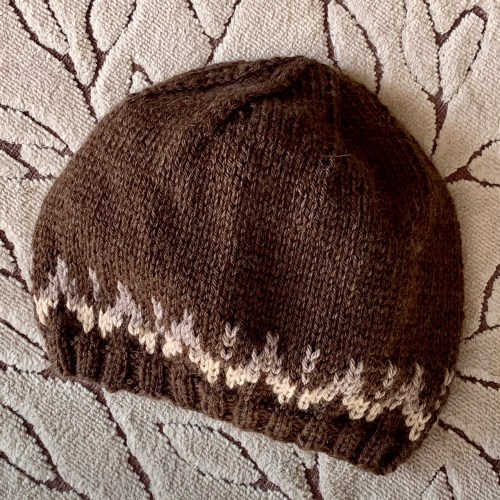
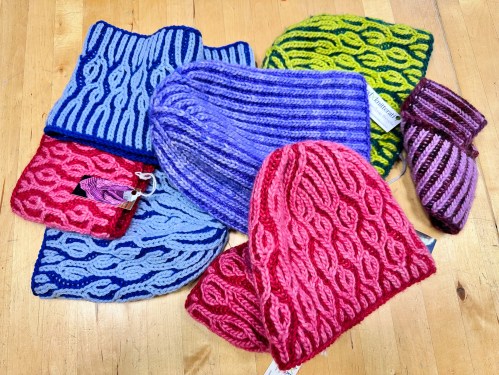
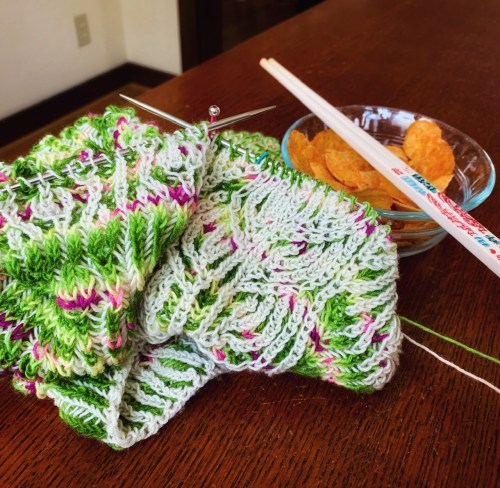
What’s this? It looks like a hat, and it is. But more importantly, it was a gauge swatch. It was a double dip!

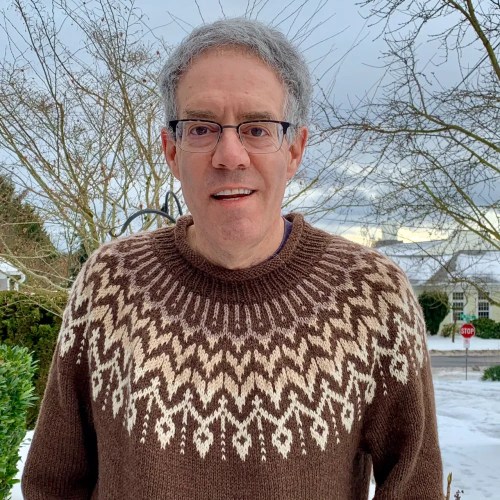
I knit a yoked sweater for DH in 2021. But first I knit a hat, to check my gauge. The sweater was Dreyma by Jennifer Steingass.

Dreyma

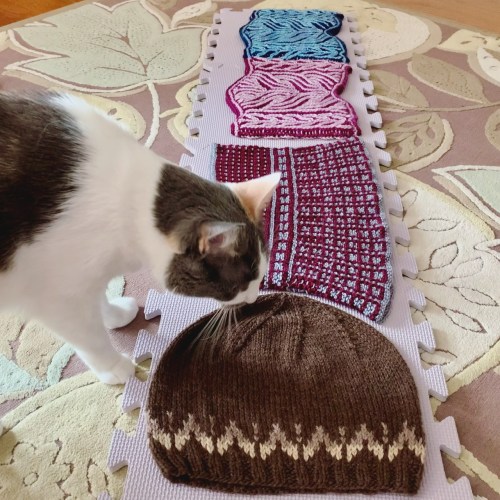
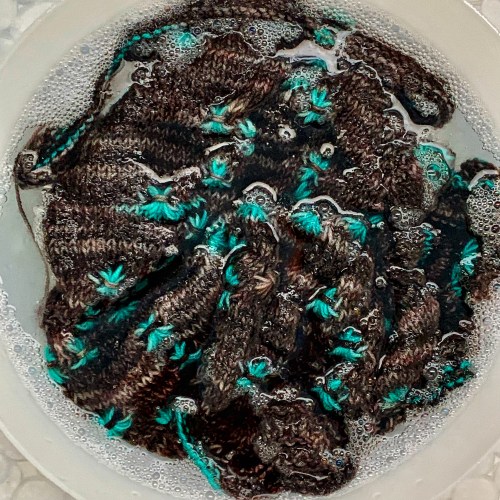
Of course, a gauge swatch for a sweater should be washed and blocked. Treat your swatch the way you plan to treat your FO! Bisquee helped with the blocking train.

Hats are pretty simple. Here’s a recipe. Measure your head. You want your hat to measure 1-2“ less than that. Negative ease keeps your hat from sliding over your eyes. Take your estimated gauge (I’m relying on the ballband guess of 5 sts/inch on a US 7. Multiply that by the number of inches you want (20” in this case). That gave me a cast on of 100 sts. I wanted to add the colorwork pattern from Dreyma, which has a repeat of 8 sts, so I cast on 104 instead of 100 (13 x 8 = 104). That would make the hat between 20 and 21”, which is fine. I could have used 96 instead, which would make the hat 19.5”. Same same. I used a 16” circular needle.

(I can’t include the colorwork pattern; it belongs to Jennifer Steingass. But you can use whatever colorwork pattern you wish, or make a plain hat.)

I like a K2P2 ribbing on the edge, which means my cast on should be a multiple of 4. 96, 100, and 104 are all fine for that. Use a needle 2 sizes smaller than the needle for the body of the hat (US 5 in this case). Knit K2P2 ribbing to desired height. Change to larger needles and knit stockinette until piece measures 5.5” from the cast on (I tried 6.5” first, based on the common wisdom that a hat is as tall as your hand before you start the crown shaping, but it was too tall. 5.5” is plenty.)

Start crown decreases. I like a crown divided into 8 wedges. Ooh, look, my cast on was a multiple of 8! Perfect. (If you don’t have a multiple of 8, decrease some stitches on the first decrease round so that you do.)

I have 8 sections of 13 sts each. I’ll decrease with a k2tog for the last 2 sts of each section.

Rnd 1: *K11, k2tog, place marker, rep from * to end. (You’re just knitting the last 2 stitches of each wedge together to decrease.)

Rnd 2: Knit all sts.

Rnd 3: *K10, k2 tog, slip marker, rep from * to end.

Rnd 4: Knit all sts.

Keep decreasing every other round, until 8 sts remain. Move work to dpns or magic loop or 2 circulars when it gets too tight on the circular needle. (Don’t knit the final plain round after the last decreases. Pointy.) Cut yarn, use a yarn needle and run yarn tail through all sts, twice. Drop yarn to inside of hat, cinch up tight, sew in ends. Done!

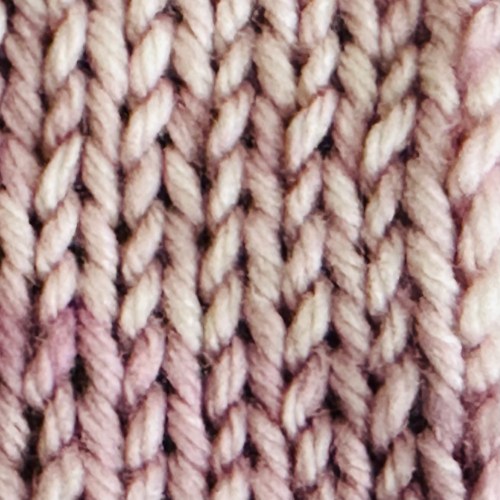
When the hat was dry, I checked my gauge to see if it changed after washing and blocking. It’s the post-blocking gauge that decides the ultimate measurements of the sweater. But you also have to know the pre-blocking gauge, which you’re going to match while knitting. Measure twice, knit once! Apologies to This Old House.

If you’d like an easy to print pdf of the Gauge Hat pattern, click here.

Need to knit a quick gift? There’s still time to knit a hat!

Steeks, log cabin knitting, and a tidy bind off

Collage of me and my Log Cabin Love steeked coasters

I’m very pleased to be teaching my second class with Modern Daily Knitting in January. It’s a workshop on cutting your first steek! We’ll be using my Log Cabin Love Coasters pattern, which also features a log cabin knitting border. That’s peak MDK. The virtual class is on Friday January 16. It will be on Zoom, and also recorded. You can register here.

While working on my log cabin edges, I’ve been annoyed by the loose stitch at the end of my bind off. It doesn’t matter in the middle of a project, because I’ll be picking up stitches all the way around the edge, but at some point there will be an outside edge that lets that loose stitch show.

I went poking around on the interwebs, and found a great tutorial by Patty Lyons on the Modern Daily Knitting site. She demonstrates five methods; some of them take pre-planning. All of them are shown with stockinette stitch, and they look great.

My favorite is the one that takes the least planning and effort. Yep, that’s me; git ‘er done. It does show a little bit more in garter stitch knitting, but I think I prefer that to having a loose stitch on the outside edge. I made a video for my log cabin knitting classes.

What do you think? Does that little blip bother you, or does the burble in the garter stitch bother you more? Knitter’s choice! I haven’t found a perfect solution, but this is good enough for me. For now. And I’ll definitely be using it for stockinette stitch.

Do you have a better way? I’d love to know that, too!

Stockinette 101

I taught two classes this past weekend. One was Brioche Pastiche, beginning brioche, at For Yarn’s Sake. So busy that I forgot to take a picture! So here are my samples of the various things you can knit with this pattern: Cowl or hat, plain or fancy, or somewhere in-between! Picture taken at the end of class.

Colorful brioche knit hats an cowls from Brioche Pastiche pattern

I also taught an entrelac class at Hook and Needle.

Knitting class

Entrelac is just a series a small stockinette squares or rectangles. It’s a good opportunity to evaluate your stockinette stitch! Does yours look like this?

or like this?

Twisted stockinette stitches

In conventional Western knitting, stitches sit on the needle with the right (leading) leg in front. In Eastern knitting, stitches sit on the needle with the left (trailing) leg in front. In either case, to keep your stitches open, not twisted, you work the stitches going into the open loop, not twisting them.

What makes your stitches sit on the needle with the right or left leg in front? It’s how you made your stitches in the previous row or round. If you wrap your stitches counterclockwise, the stitches will be mounted with the leading leg in front (conventional knitting). If you wrap your stitches clockwise, your new stitches will be mounted with the trailing leg in front. Do you mix it up? In Eastern Combined knitting, knit stitches are wrapped counterclockwise, and purl stitches are wrapped clockwise, resulting in a mix of stitch mounts.

Do some of your knit stitches have a little cross at the bottom of the V shaped stitch instead of being open? Do you want that crossed stitch? It does make your knitting tighter. But if you want it, you’re set. As long as you get the result you want, you’re doing it right! If you don’t want that cross, read on.

If you’re an Eastern Combined knitter and some of your stitches are twisted, and you’d like your knit stitches to be open at the bottom instead of twisted, you have two choices. You can change the direction of your purl, which would be conventional Western knitting. Or you can continue to wrap your purls the same way, but change how you enter the stitch on the next row or round.

Here’s a little video to show you how.

One more thought: If you wrap both your knits and purls clockwise, you’re an Eastern Uncrossed knitter. The principle is the same. As long as you work into the open stitch (not making it cross when you enter it), your new stitches will be fine. You just need to know how to work them on the following row or round.

How do you knit? English, right hand carry? Continental, left hand carry? Western? Eastern? Eastern Combined? Interestingly, four of my eight entrelac students were Eastern Combined knitters, some English and some Continental. One knew how to untwist her stitches already. The other three learned a new thing, besides entrelac.

Again, as long as you get the result you want, you’re doing it right. And if you’re mid-project and want to switch, wait until you’re done because it will definitely show.

Knit on, my friends!

Eastern Uncrossed Brioche

I had a busy weekend teaching for Vogue Knitting Online. Sunday’s Brioche Pastiche class was particularly interesting from a teacher’s standpoint. Brioche Pastiche is a choose your own adventure pattern, good for brioche beginners and those ready for learning increases and decreases.

Brioche Pastiche options

Several of my students had tried brioche before, and wanted to review and move forward. Two had taken classes with me before. I teach brioche with conventionally mounted stitches (right leg in front), either English (right hand throw) or Continental (left hand carry, pick or throw), but the stitch mount is the same. Right leg forward.

Last February I had a student who knit using the Eastern Uncrossed style, where all stitches and yarn overs are left leg forward. I made a video for her, because it’s so different from what I usually teach.

That same student came to yesterday’s class to move forward with increases and decreases, so I had to learn that on the fly. I made a video after class, and here it is.

If you don’t knit Eastern Uncrossed, you probably don’t want to watch it because it will confuse you. But it does show that I’m dedicated to making sure my students get what they need!

How was your weekend?

Trailing Leaves coupon extended

Trailing Leaves

Well, last week was super hot, 100 degrees F here in Portland. Definitely not dreaming-of-wool weather! So I’m extending the discount for Trailing Leaves to September 15, 2024. Use coupon code WILLOW for 15% off the Trailing Leaves pattern on Ravelry or Payhip.

Trailing Leaves

It’s going to be a lovely 74 degrees here in Portland today, with rain coming in tonight. Perfect.

I made a new video tutorial! Trailing Leaves uses a brioche purl increase along the border edging, brpyobrp. Which is just what it sounds like, but here’s the video. There’s also a link to it from my tutorials page, should you ever need it.

Time for me to get back to my knitting! I’m on a brioche plus assigned pooling tear…

Powering through this brioche knitting

When you want a snack, but you don’t want orange dust on your knitting, chopsticks are the perfect snack tool. Just sayin’.

Dropped stitch, oops!

I tried a different brioche 4 stitch decrease on this project. It’s a lot faster. But it’s also prone to dropped stitches, so I’m not going to recommend it. Which means I don’t have to make a video tutorial after all! My tried and true slowpoke method is a better choice for me.

In case you’re daring and want to try this one: Slip 3 stitches as if to knit 3 together. Knit the next two stitches together. Pass the 3 stitches back over the k2tog. (Don’t forget to pass the yarn overs along with the stitches when slipping/knitting/passing.) That’s it! But I found 3 dropped stitches in that round, so I won’t be doing that again.

I did manage to fix the dropped stitches, and I just finished binding off. Now it’s soaking. Looking forward to seeing how much this grows (I hope) with blocking!

Red Alder Classes Wrap Up and Eastern Uncrossed Brioche video

I had a great time at Red Alder Fiber Arts Retreat. I taught 4 classes, took 2 classes, and learned a lot from all of it! I was pretty brioche- and pooling- centric for all of it.

Let’s talk stitch mounts!

With conventional western style knitting, the right leg is on the front of the needle. This is true for both English throwing and continental picking methods. Both stitches are worked through the front loop, and the yarn wraps counterclockwise around the needle.

With eastern combined knitting (usually continental, yarn in left hand), the knits are formed conventionally, and the purls are wrapped/caught clockwise, resulting in the purl stitches mounted with the left leg on the front of the needle. For knitting in the round, the purl stitches would need to be purled through the back loop so the bottom of the previous stitch isn’t twisted. If knitting flat, the back of the purl stitch is a knit stitch, and it would need to be knit through the back loop to untwist the stitch.

Amanda in my beginning brioche class is a continental Eastern Uncrossed knitter. This means that she makes her all of her stitches with the yarn going clockwise around the needle (both knits and purls), which results in the left legs of all her stitches mounted on the front of her needle.

It took a little thinking, but we figured it out, and I made a video for 2 color Eastern Uncrossed brioche in the round.

Eastern Uncrossed brioche rib in the round

That helps me teach, and that helps knitters not have to change their knitting style when learning brioche. Win-win! Now I’m thinking about eastern combined knitting in the round; there are a couple ways to think about that purl stitch. I’m saving that for another day.

Color Blocked Brioche

I took 2 classes from Xandy Peters. The first was Color Blocked Brioche. If he had named it Brioche Intarsia, would I have signed up? Probably not! But color blocked intarsia in brioche is fun. Food for design thought.

The other class was Stitch by Color. I didn’t bring the right yarn for this; my yarn just has one pop color, and sprinkles (not enough) of other colors. I’ve been on the pooling train for a year, and that’s the way I was thinking. What I really should have brought is a space dyed yarn that has longer stretches of several colors. Then I could pull out one color to accentuate, or eliminate (by concentrating it on the wrong side of the work). Here’s an example from Xandy.

Stitch by color!

All of these colors are in the yarn; the pink and red you see on the left edge of the work are emphasized on the wrong side behind the yellow and gray, and vice versa. A great way to accentuate what you like, or hide what you don’t like! We learned some fun pooling stitches, too.

I helped my classmate recreate her dye skein so she could see where the color repeats were made.

Mt Rainier sunrise

That’s the teaching/learning part of the wrap up. There’s still the shopping! I came home with a few treasures. Still trying to catch up from Red Alder AND VKLive NYC!

Suspended bind off tutorials

I often find that I need just a teeny bit more flexibility than I get with a standard bind off. My favorite long tail cast on is nice and flexible, and I don’t want my bind off to be tighter than my cast on.

First: How do I get my long tail cast on to be loose enough, but not sloppy? Leave space between the stitches as you add them to the needle. Don’t cinch them down tight on top of each other.

A suspended bind off suspends the moment that you drop the second stitch from the left needle in the bind off process. You can pull the yarn up to make a slightly bigger stitch when knitting that second stitch, and that also makes the bind off looser. Then you bind off the previous stitch before dropping the second stitch from the left needle. This bind off works in knit, purl, ribbing, whatever. It doesn’t matter if you’re knitting flat or in the round, either. It looks exactly like a regular bind off; it’s just looser. Here’s a video I made a while back.

Suspended Bind Off

What about brioche? Yes, it works for brioche, too. Sometimes I include what I call a closing row when knitting brioche, bringing those brioche stitches back to plain knits and purls. But if it affects my patterning (as in a decorative brioche increase/decrease patterning), I’ll opt to skip the closing row/round. Then I just use a suspended bind off incorporating those brioche stitches. I used this for my Aspen Leaf Brioche Cowl so that I’d have a nice edge for seaming, and no extra brioche above the last leaf motif. Here’s the new video.

Brioche Suspended Bind Off

I have other stretchy bind offs that I like, too. Jeny’s Super Stretchy Bind Off (good for ribbing), Elastic Bind Off (good for lace), Russian Bind Off…check out my tutorials page for all these and more.

What’s your favorite bind off?

How to block a bandana cowl

I’ve been designing and knitting a lot of bandana cowls lately. This is a great shape to wear; it pops on over your head, and stays put. I love wearing these when I’m teaching; they don’t fall off when I lean over to look at a student’s knitting. But how do you block this shape?

Cosette

You could block it this way, but it will leave creases at the back neck and front.

Cosette, gentle blocking (not a hard stretch)

Using tubes of some sort, or rolled up washcloths, will keep you from getting creases as your cowl dries. This tall neck could probably have used a separate set of tubes for the cowl portion, separate from the triangle.

It turned out fine, though!

Starfall

I upped my blocking game for my Starfall assigned pooling cowl, because it needed a more assertive blocking to set the stars and open up the lace border. Here’s the whole process.

Soak cowl in cool water with a bit of no-rinse wool wash for 20 minutes. Gently squeeze out excess water (do not wring). Roll up cowl in a folded towel and walk on it (!) to remove more water.

Block cowl to desired dimensions, pinning out scalloped lower edge. I also put wires along the neck edge to maintain a straight edge. It’s easiest if you lay it out with the triangle face down and the back of the cowl on top so you can pin out the scalloped edging of both the front and back at the same time.

Place tubes into the sides to avoid creases; I use the tubes my blocking wires came in. For this particular cowl, the center spine is the center front. The end of the bind off is the center back (it’s the arch of the scallop, not the point).

See how laying the cowl down with the back side up allows me to pin both the front and back scallops?

Starfall blocking, now front side up

I usually flip my cowl over the next day to speed up drying; you can pin out the scallops on the just the front because the back will be dry already. Let dry completely. Sew in ends.

Have you blocked a bandana cowl before? Would you do it this way? I really like it!

Ebb and Flow

Loose Lace Quick Fix

Say that three times quickly!

We’re having a gorgeous week, and I’m making the most of my outdoor space. I’m currently swatching for a little cowl, and it’s not even brioche! The yarn here is Hazel Knits Artisan Sock in Cackle. I have 75g left from my Brioche Knit Love book projects, and that’s enough for the kind of cowl I want. I hope.

The edging features this favorite motif of mine. It’s called cats paw, but I see it as a flower. What I don’t like about it today is that the stitches above the yarnovers look sloppy, and it detracts from the motif.

So now I’m knitting through the back loop on the stitch above the yarn over, on the next right side row. (It wouldn’t help to knit through the back loop on the very next row; that would close the eyelet.) I love how it makes the center of the flower pop. But the stitch above the upper right eyelet looks a little prominent (more so in real life than in this picture).

It looks better if I twist the stitch in the opposite direction. Now it mirrors the one on the left perfectly. I *could* twist all the ones on the right side of the motif this way, but it’s fussy and doesn’t really show in real life. So just the top right one for me! You do you. I definitely like this better than the first picture!

We had a milestone last night. Puddletown Knitters Guild has been Zooming through the pandemic, but last night we had our first hybrid meeting!

I was impressed by all the equipment it took to make this happen. Multiple mics, sound mixer, speaker, 2 laptops, projector, 2 extra iPhone cameras. There was probably more than that involved; that’s just what I could see. Thanks so much to the guild for making this happen, and in a new space (we outgrew the old one).

Anne Berk was the speaker, and she talked about her favorite kind of knitting: intarsia, or Annetarsia! I’ve taken her Annetarsia in-the-round class; she made it so easy. She and I have the same attitude about knitting: It needs to be fun!

If you’re interested in learning intarsia, Anne’s book is a great place to start. You can find it here.

Is intarsia on your bucket list? Brioche? (I have a book for that!) Lace? Stranded colorwork? Do tell!