Tag Archives: mending

Darn it! Hook it? Mend it!

My sister asked if it’s possible to mend a hole in a shawl. Well, anything is possible, but I hadn’t done that before.

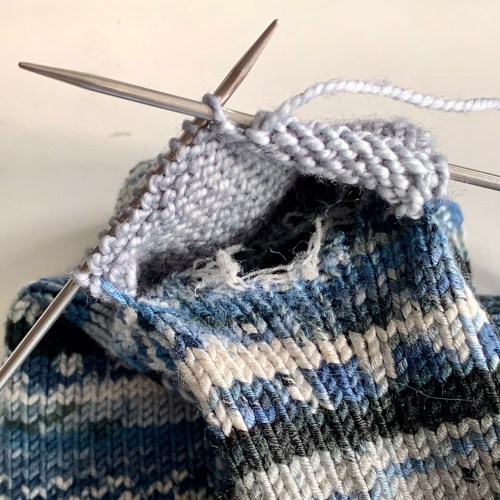
It looked like it was just one stitch, so I thought I could just duplicate stitch over it. Unfortunately, a closer look revealed that the edge stitches were also frayed, so I’d have to make a patch about 4 stitches wide by 3 stitches high to attach it to stable fabric.

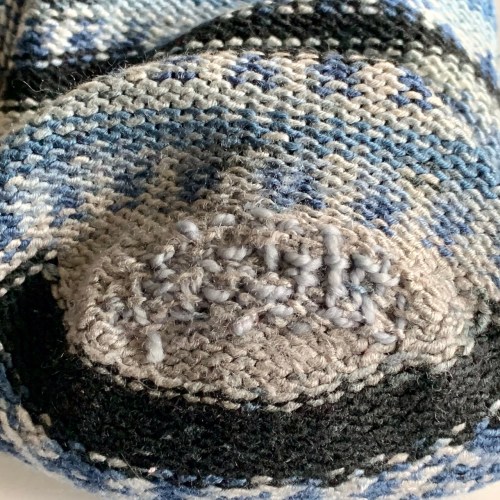
I didn’t have the exact same yarn any more, but this red was pretty close. The back isn’t nearly as pretty, but it’s the back! You can definitely see the frayed hole on the back side, plus the patch covering the front.

I ran yarn back and forth across the hole, leaving a loop twice as long on the left edge as the yarn covering the hole, each time I passed there. Then I used that yarn and hooked up a column from an existing stitch below the hole, beginning with the stitch on the furthest right. At the top of the column, graft to the existing stitch above using the yarn that’s still in the yarn needle. Then hook up the next column and do the same. Lather rinse repeat until the hole is covered. Hooking up uses up the extra loops that were on the left.

It’s similar to the patch I knit over this hole (blog post here) but it’s hooked up instead of knitted back and forth (and also much smaller than that blown out heel). It’s tidier because instead of using k2tog and ssk at the sides of the patch to attach it to the fabric, which creates bulk, the yarn is just put into position to be hooked up, so it lies flatter at the bottom and sides of the patch. The only place it’s bulky is at the top of the patch, where it’s grafted to the existing fabric. I couldn’t get it flat. But it’s still better than a hole that’s going to get bigger!

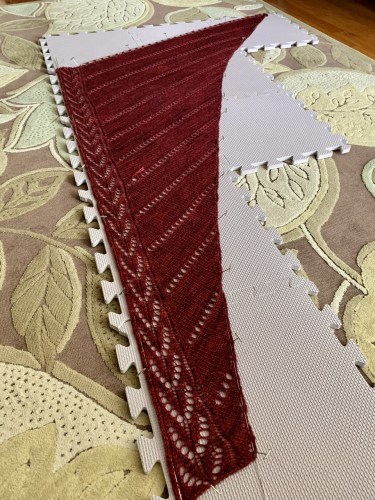
I decided to re-block it, because blocking is magic, and it had been a while. And that’s when I discovered…

another hole. This one happened right next to an eyelet, which means the same kind of fix wouldn’t be appropriate here.

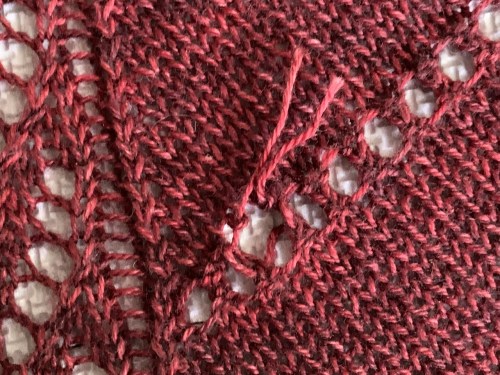
I played with it a little. I think I can work with these two ends, bringing them to the back and tying them off. The edges here aren’t frayed, so it should be pretty secure. I’ll see what happens after it’s dry; I can’t do anything yet.

Whew! That was a lot of words to describe the fix. Should I make a video tutorial?

Do you mend your knits? I always mean to, and drop them on the mending pile, but it’s not a high priority for me. You?

Sock repair: Knitted patch

Remember these socks? They belong to a friend’s brother, whose wife had knit them for him. She passed away last year, and I offered to try to mend the blown out heel. I finally had a moment to sit down with this project. It turned into a much larger moment, but it was worth it.

I didn’t recognize the kind of heel in this sock; it’s not my usual flap and gusset, so I winged it. I picked up stitches in a line two rows under the hole, making sure to go a couple stitches past the hole on either edge. I knit across the row, and purled back. From there on, I picked up a stitch at each end of every right side row, to k2tog with the beginning of the row, and ssk at the end of the row to attach the patch to the sock. Purl back. When picking up the next edge stitches, skip up a row (go up 2 rows) to make up for the purl row.

See how my patch had parallel edges? That didn’t quite work. Because of the way the heel was shaped, I needed to decrease 6 stitches as I went up, so that I could kitchener stitch to the smaller number of stitches *above* the hole, since my sides were tacked down with a set number of stitches between. (Still don’t know what that heel shaping was, but there were fewer stitches between the edges when I got there, so I had to rip back and work in the decreases. I think that the new knit fabric is stretchy enough to make up for the missing heel shaping.)

Looking back from the other side. We’re just going to cover up that hole and pretend it never happened.

Here’s the finished patch, kitchener stitched (grafted) to picked up stitches above the hole. Tidy!

Here’s what it looks like on the inside. I used my ends to tack a bit of the frayed fabric to the inside of the patch.

I used duplicate stitch to reinforce the other heel because it hadn’t broken through yet. It looked terrible but I was afraid to pull my stitches out to re-do it, because the threads of the heel were very thin, and I was afraid they would break if I pulled too hard.

I did some darning on the inside to see if that would make it secure, but it still felt pretty weak.

So I did a knitted patch here, too! I worked this one in the opposite direction, so instead of decreases I used increases, and grafted at the lower edge (left sock). Easy once you know how. Everything feels tidy and secure. I put my foot in them, and they feel fine.

Now these socks can go back to their owner. I’m glad I could help.

Have you ever darned or patched socks? I have used a little duplicate stitch on thin spots, but I had never fixed an actual big hole before this. I’m pleased to have this new skill in my tool kit!

(K)nitpicky

I’ve been going through my sweaters, deciding what I like and what I don’t. I’ve got a bee in my bonnet to alter the ones that don’t make me completely happy. That’s the thing about knitting a sweater; we don’t know exactly what it will be like until it’s done. Even if it fits, it may not be as flattering as one might wish. (I’m hoping my top down Raspberry Vodka Lemonade will avoid these issues since I can try it on as I go…)

I’m feeling empowered by a recent sewing incident. The red polo shirt for father-in-law’s birthday? I got mine early so I could hem it; they usually fall halfway to my knees. A polo that fits in the bust is going to bind across the butt if it’s too long, so I shortened it by 3 full inches. While I had it in my clutches, I tapered the sides, too, because I hate looking like I’m wearing a box! It made a huge difference. I look tall (hah!) and slender instead of stubby and boxy. Or at least, it looks like my shirt fits.

group

So now I’m going to make some more changes, because knitting is just fabric, as we learned in steeking class.

free at last

I’d be happier if this were about an inch longer. I made it short because I’m short on top, but now I think this just accentuates my shortness. I keep tugging at it, hoping it will grow. No dice. So I’m going to remove the button bands, then snip just above the bottom ribbing, pick it out and knit a new longer ribbing. If I cut above the ribbing and start there, you won’t see the 1/2 stitch jog that will result from changing from bottom up to top down knitting. It has to be ribbing rather than stockinette so the jog doesn’t show. Wish me luck!

ruffle tank

The armholes on this red linen ruffle tank are just a bit deeper than I like. If I shorten them a bit, the total length won’t be too short, but I’ll feel less exposed. Rather than undoing the armhole edgings and frogging down, I’m just going to take up a little seam at the shoulder, about 1/4 inch down. While I’m at it, I’m going to sew a little seam on the sides, too, because I’d like this to be a little closer fitting like my blue version.

ruffles

The fabrics are different; the red one is all linen, whereas the blue one is merino and linen. Different drape, but I think the very drapey red one would look better a bit tighter. (And hey, I forgot that I own black linen slacks! I have to find those…)

I’m on a roll! While I’m at it, I’ll mend the holes in my log cabin blanket. Kitty’s claws have done a number on it. I am the boss of my knitting!

What bee is in your bonnet?